This Article will provide instructions on how to edit, add, and delete events post-acquisition within BioLab.
Step 1:
Open your data file in BioLab.
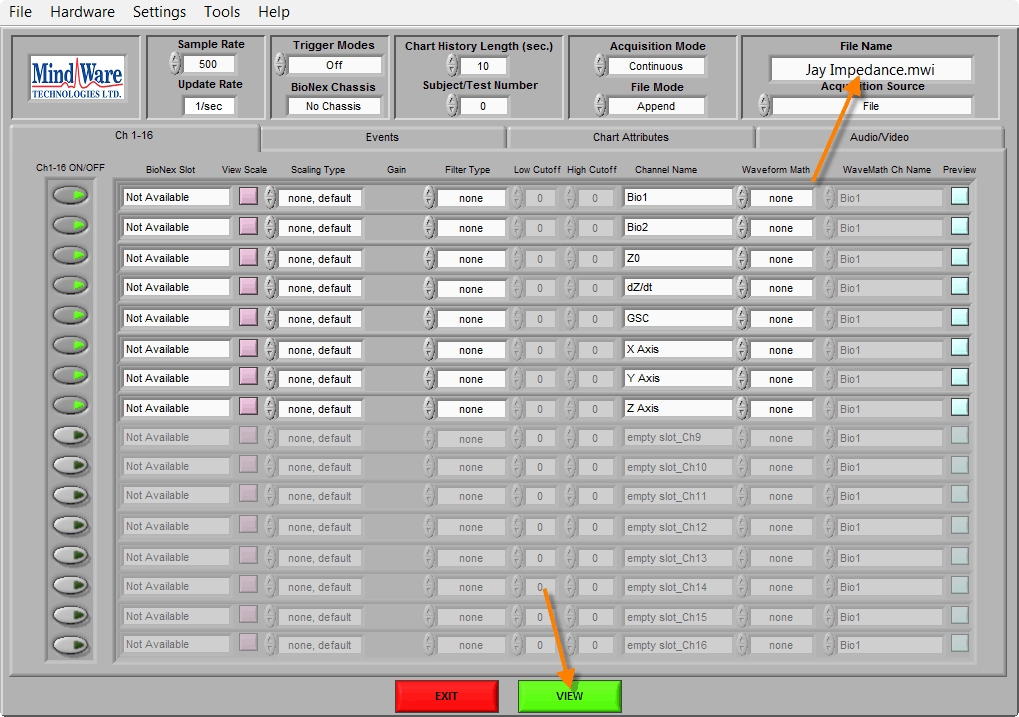
Step 2:
Ensure that the correct file has been opened by verifying the file name under File Name and then select the green “VIEW” button at the bottom of the screen.
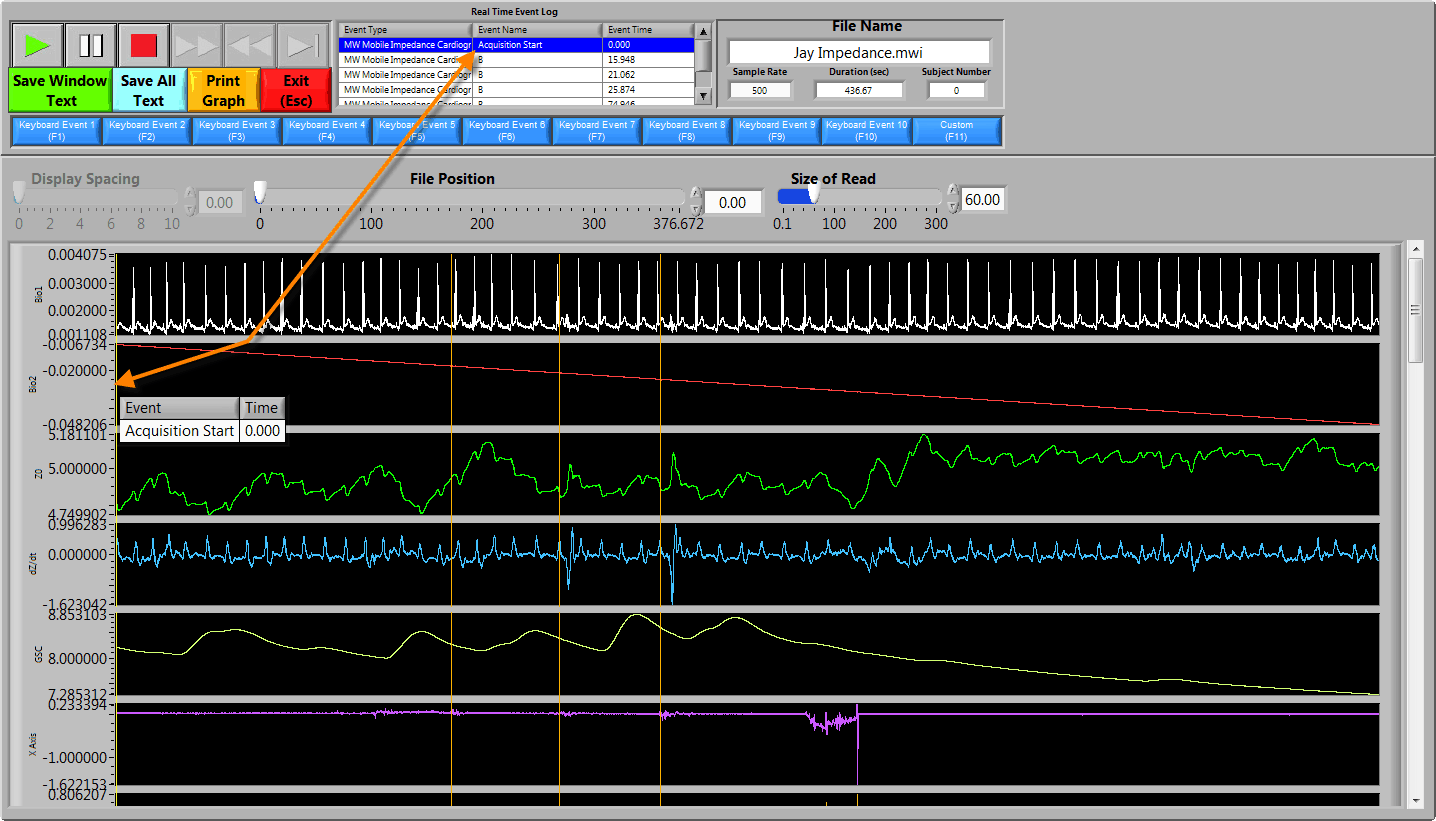
Step 3:
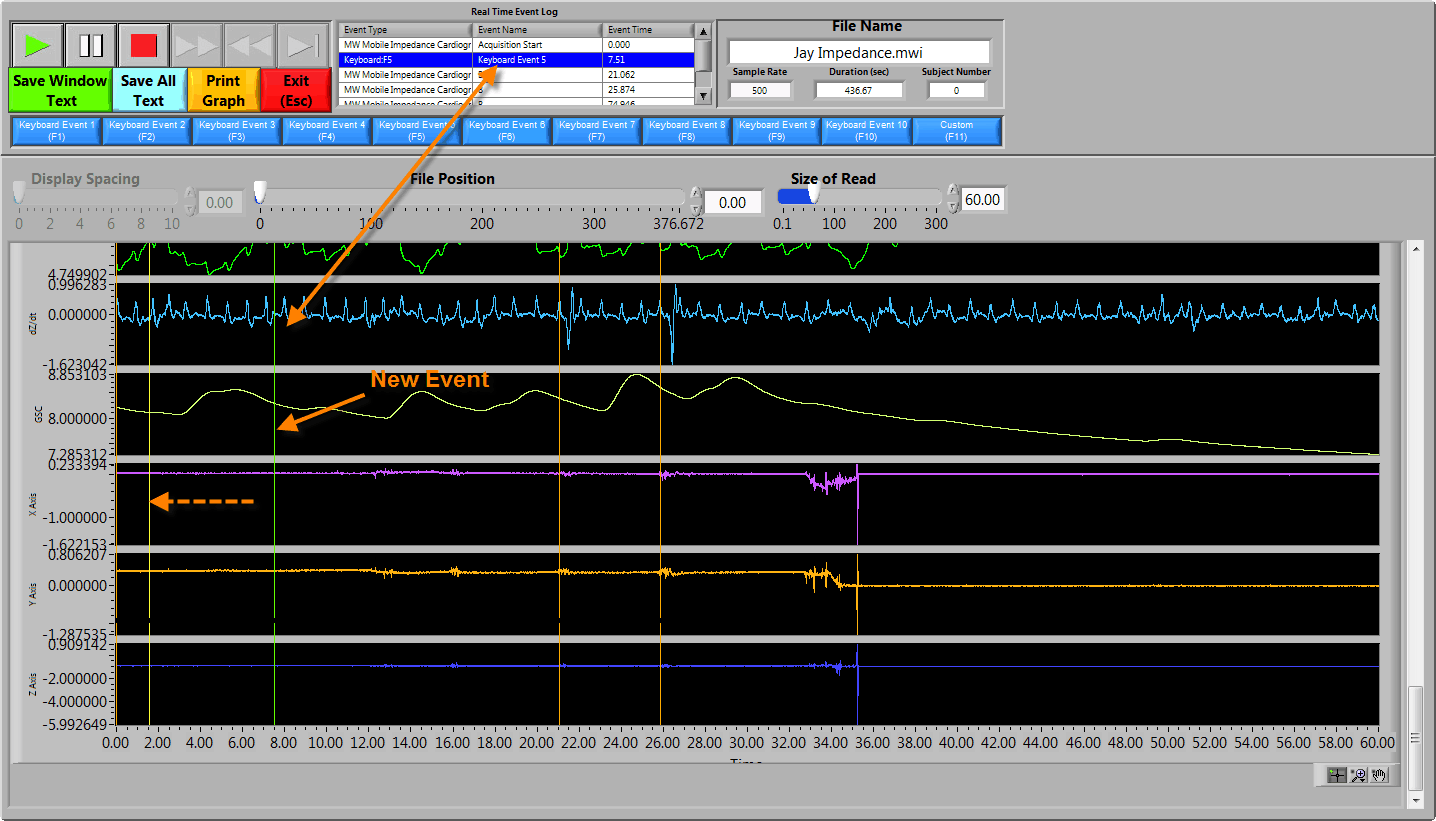
In the File Playback window, all of the events that occurred during the experiment are visible as vertical bars. By double clicking on an event in the “Real Time Event Log” at the top of the screen, BioLab will automatically align that event to the left of your screen. The title and time of any event can also be viewed by hovering the mouse cursor over the vertical event bar.
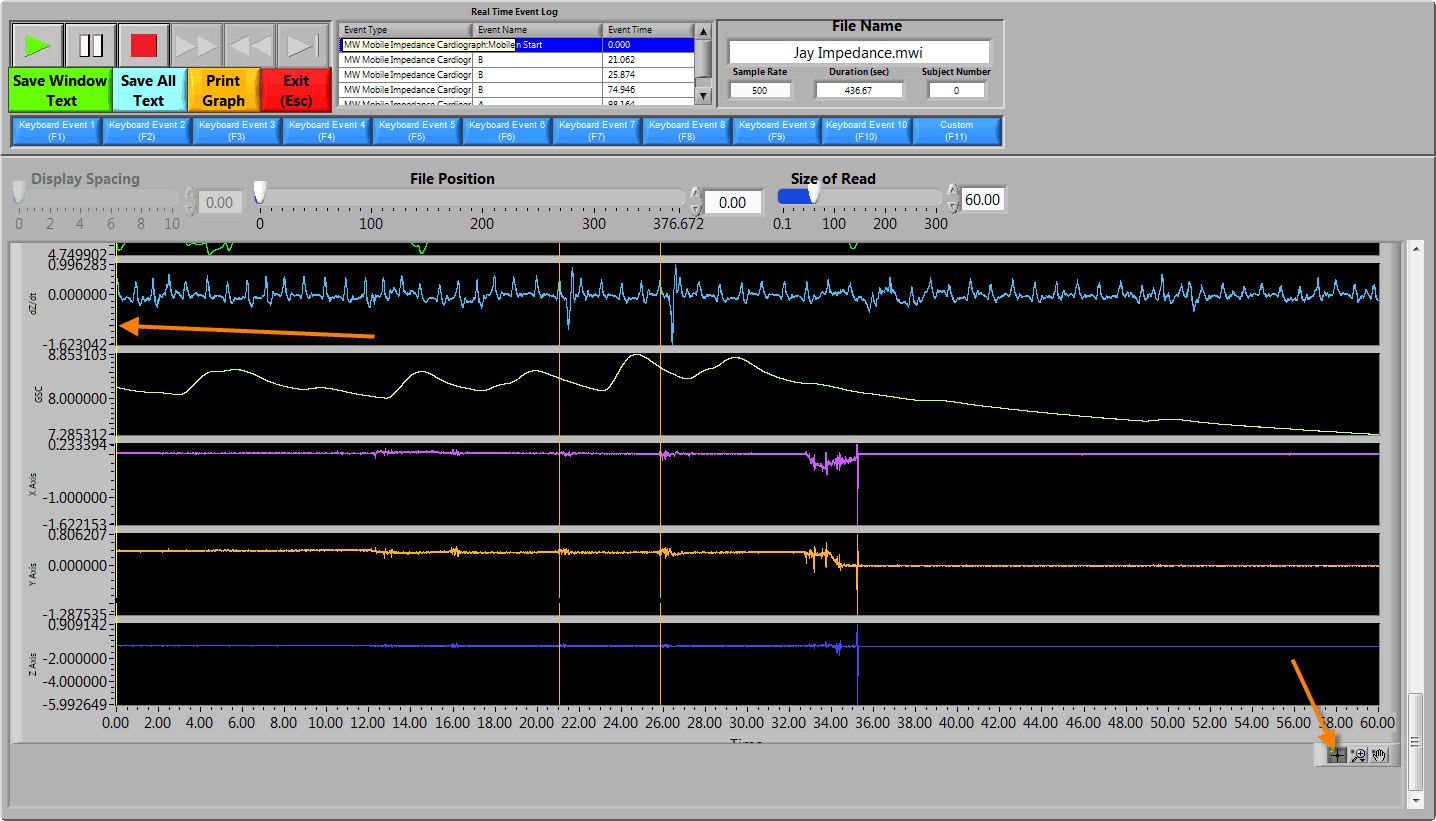
Step 4:
To remove an event that was created during acquisition right click on the event inside of the Real Time Event Log and select “Remove Event”.

Step 5:
To add an event, first scroll to the bottom right of the screen and ensure that the cursor select tool is selected. Next, click and drag the yellow vertical bar which will be found at the far left of the data plot to the position in which an event is to be added.
Once the yellow vertical bar is in the position in which an event is to be added click on the appropriate blue event button near the top of the screen or press the corresponding function key on the keyboard.
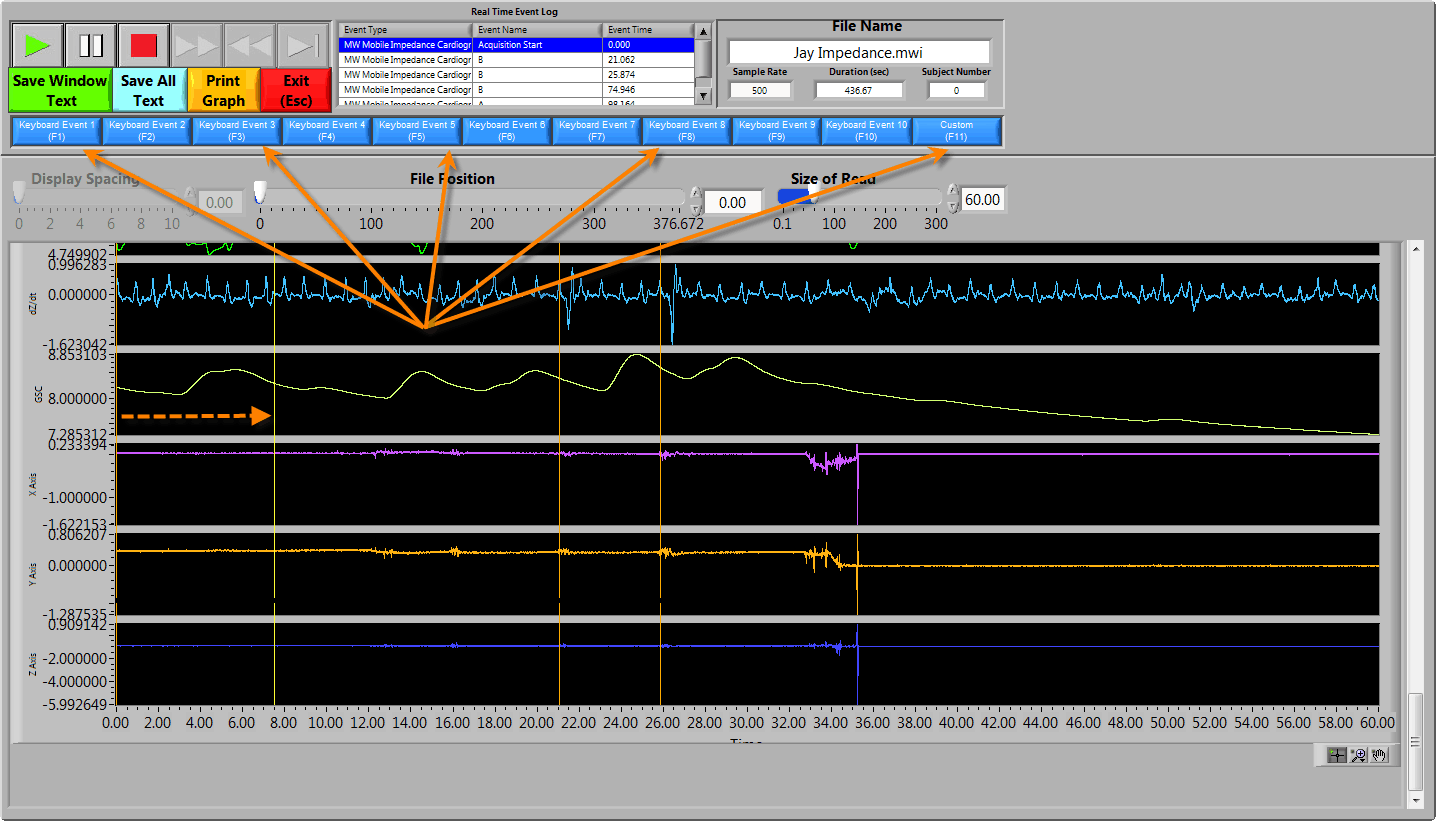
Once an event button or function key has been pressed grab the yellow vertical bar and move it to a different location to confirm that an event has been added.
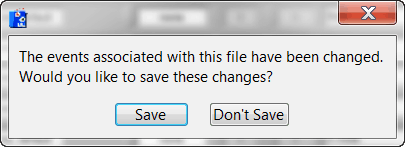 After event editing is complete click on the red “Exit” button near the top left of the screen. If any edits were conducted, a window will appear asking if the changes should be saved. Please select “Save” to ensure that the newly edited events are saved.