Connecting the BioNex and Chronos
First, connect the Chronos to the BioNex using the provided cables. You will need a Chronos Adapter for MindWare BioNex to easily connect the systems – contact us for more information or to purchase.
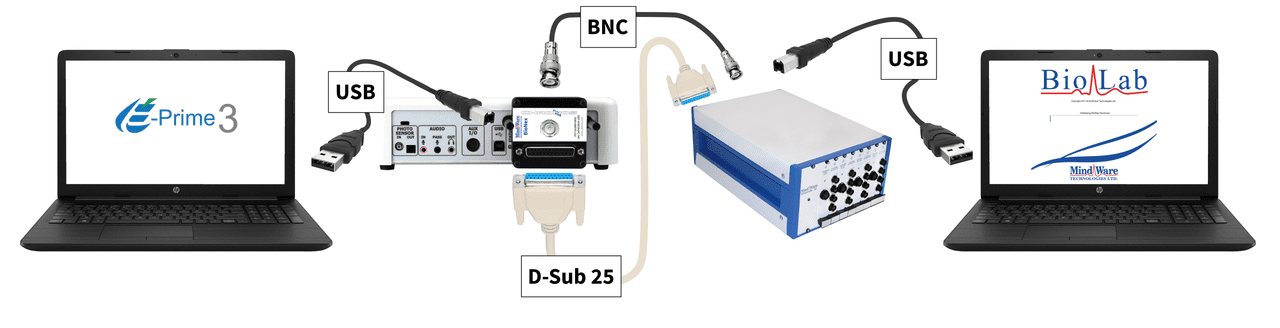
The BNC cable should be plugged into the Trigger In port. The DB-25 cable will typically be plugged into the Digital I/O 1 port, but either port could be used.
BioLab Configuration
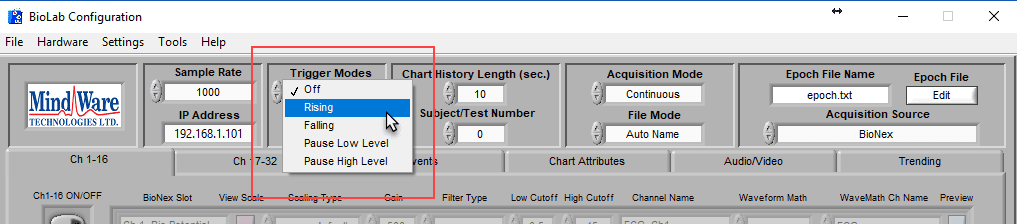
Launch BioLab and ensure that your Trigger Mode and Events are configured properly. In the main settings of the BioLab Configuration screen, set Trigger Mode = Rising to start data acquisition on the rising edge of the trigger pulse initiated by E-Prime.
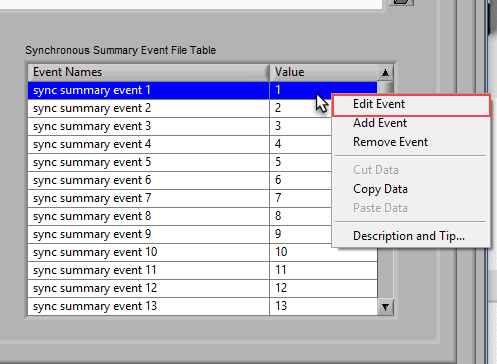
Next, navigate to the Events tab and then to the Digital I/O port you plugged your cable into. Change the Event Mode to “Summary”

Then define your event names based on the codes you plan to send from E-Prime. This will define how events will be labeled for analysis purposes.
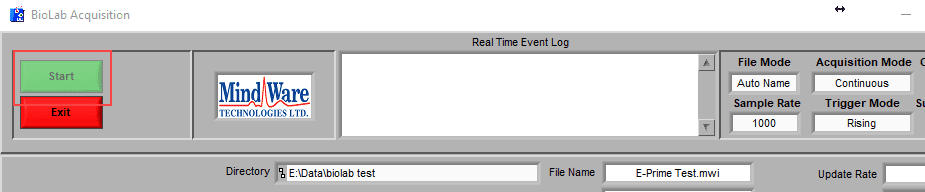
Now, press Acquire and BioLab will be awaiting a trigger from E-Prime
Eprime Configuration
Chronos Device Configuration
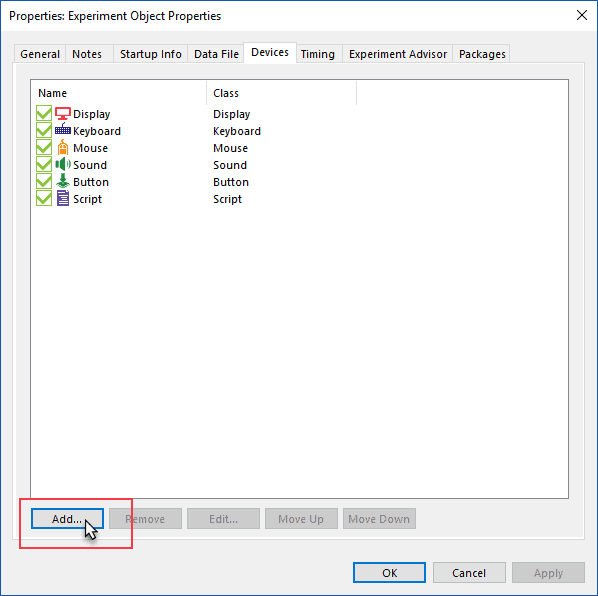
In E-Prime, double-click on the Experiment Object to configure the Chronos
Navigate to the Devices tab and click Add…
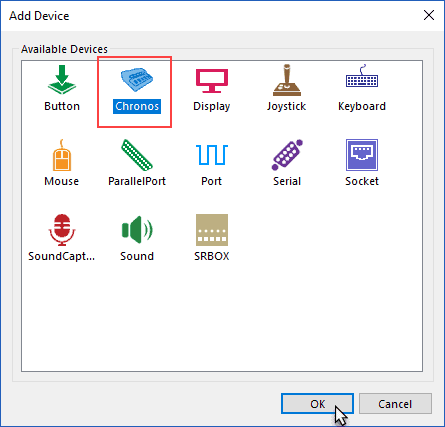
Highlight Chronos and press OK
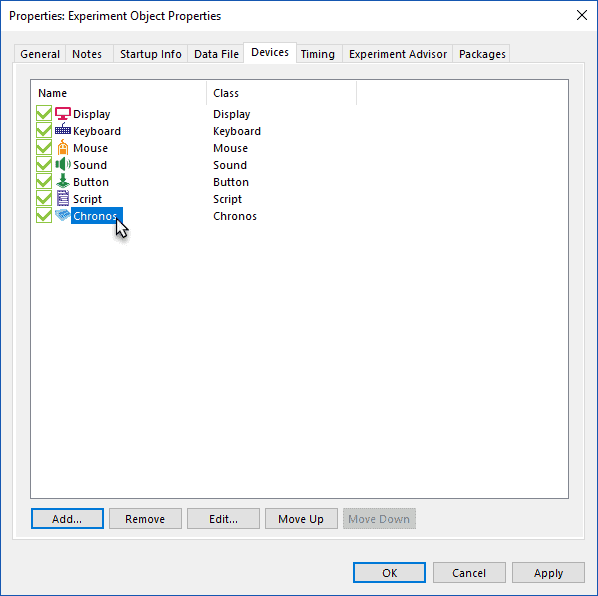
Back on the Experiment Object Properties window, double-click Chronos
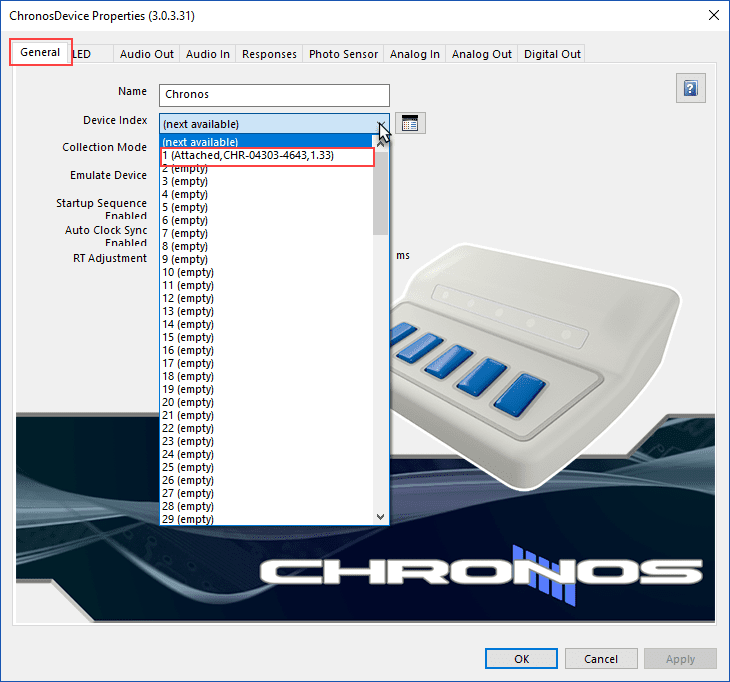
On the Chronos Device Properties window, select the Chronos to use from the Device Index drop down
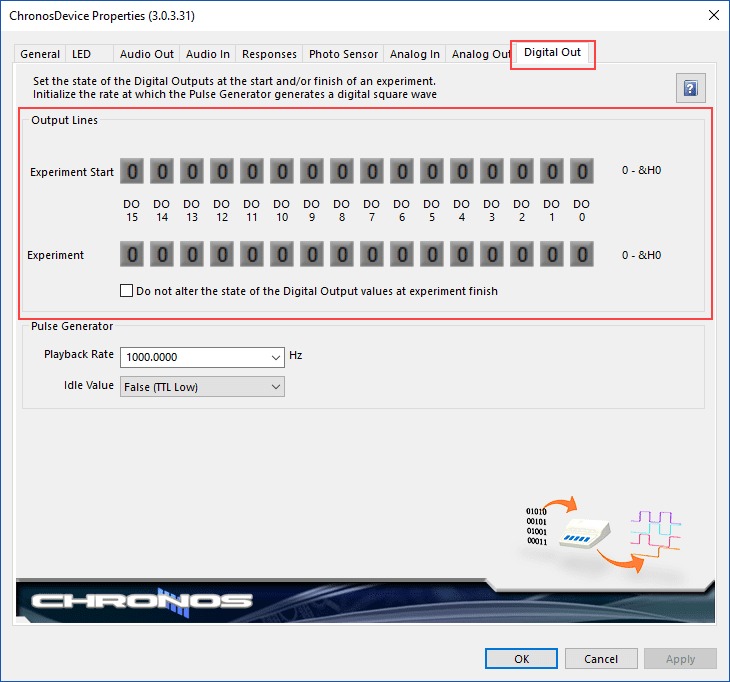
Navigate to the Digital Output tab and confirm that all digital lines are set to default to “0”, or low level. This is helpful to ensure your digital lines start at a known value at the start of the experiment
Sending a Start Trigger
The BNC out on the Chronos BioNex adapter is tied to the 9th bit on the Chronos Digital Out port. We can use task events to schedule a start trigger. This is typically done on the offset of an introduction slide, but could be done with any task event based on the experimental requirements.
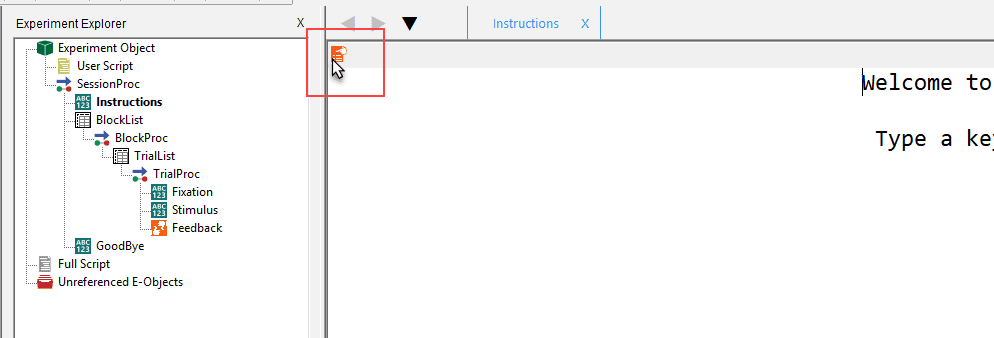
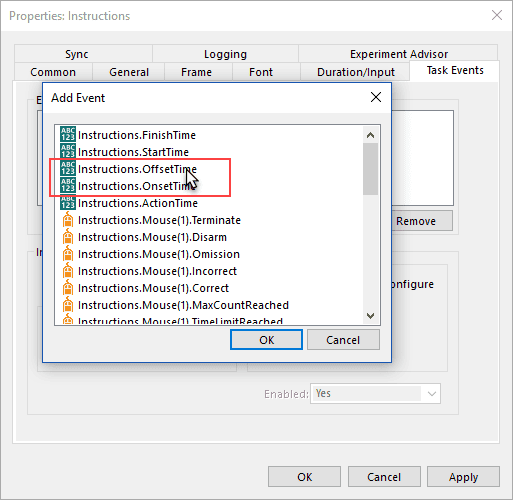
To set the start trigger task event, navigate to the object where the trigger should be sent and open the object properties
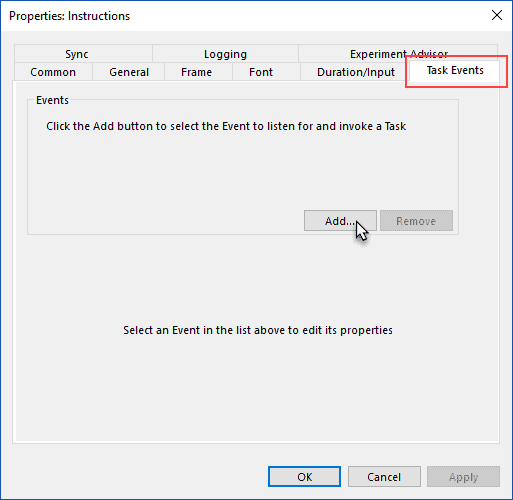
Navigate to the Task Events tab and press Add…
Select the timing of the task event – in this case, we will choose the offset time of the current object
Once the task has been added, click the “…” button to select the device/function that will execute the desired action
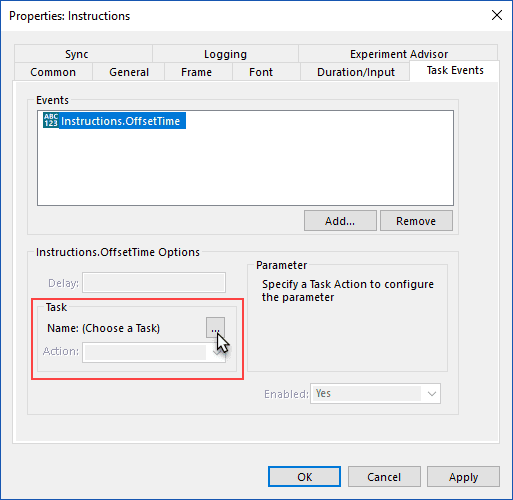
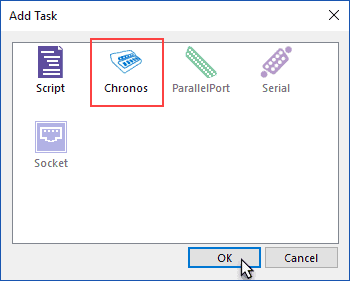
Select Chronos and press OK
From the Action dropdown, select the DigitalOutSetBit action. This will set the specified bit to a high state. Remember that we already initialized the digital out bits low, so this will create a rising edge on that digital line, which will trigger BioLab when Trigger Mode = Rising
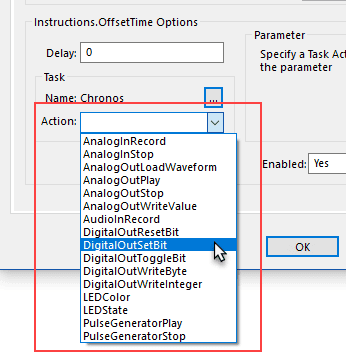
Finally, we need to define the digital bit to set. The bits are 0-based, so the 9th bit is actually referred to as “8”
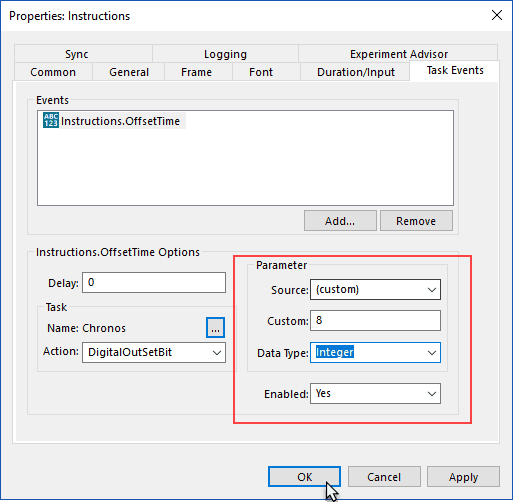
Press OK when finished and this object will trigger BioLab during execution
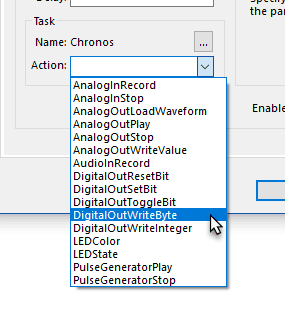
Sending Event Codes
Sending event codes will once again require configuring Task Events but will use a slightly different action. Instead of setting a single bit, we want to send a byte code, which allows for values 1-255 to be sent to BioLab. Each of these codes can represent a unique event and can have a custom label associated with them in BioLab for use during data analysis.
First, follow the steps above to create the Chronos Task Event. Then, select the DigitalOutWriteByte action
Change DataType to Byte, and enter the desired event code in the Custom field.
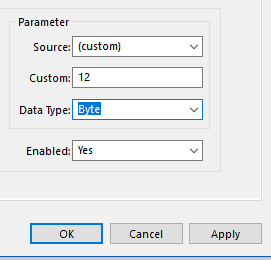
Now this object will send the specified event code based on when the Task Event is scheduled to run.