First introduced in BioLab 3.3.0, UDP Commands are a mechanism by which you can start acquisition, stop acquisition, and log events via a network interface. These UDP commands can be sent from any source capable of opening a UDP port and sending data. This article will focus on how to send these commands from the E-Prime stimulus presentation software by Psychology Software Tools, Inc. (PST). Note: UDP commands to BioLab are subject to network and processing delays and are not a substitute for external trigger and event lines when precise timing is required.
Finding the BioLab Computer IP Address
Before you get started with programming E-Prime on the stimulus presentation PC running E-Prime you will need to capture the IP address assigned to the data acquisition PC running BioLab. Please record this IP address in preparation for the “Setting up a Socket Device in E-Prime” section that follows.
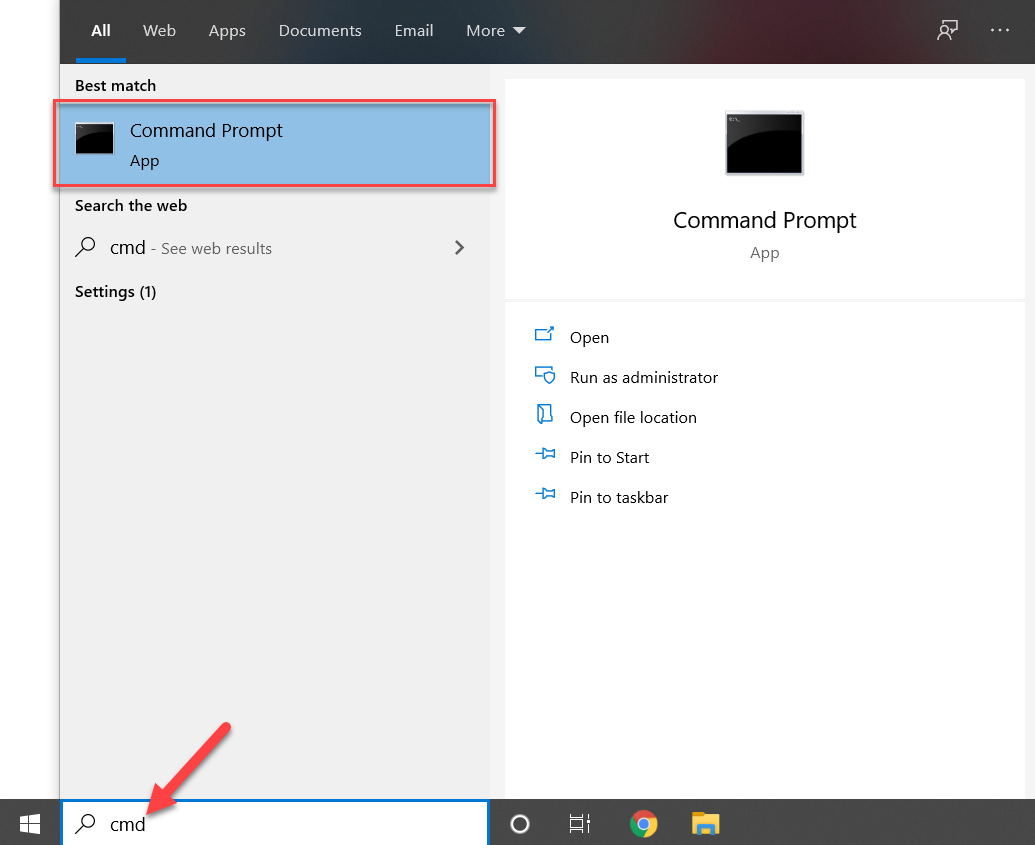
Begin, by navigating to your Windows search bar, type in “cmd”, and then select the “Command Prompt” option as seen in the image below.
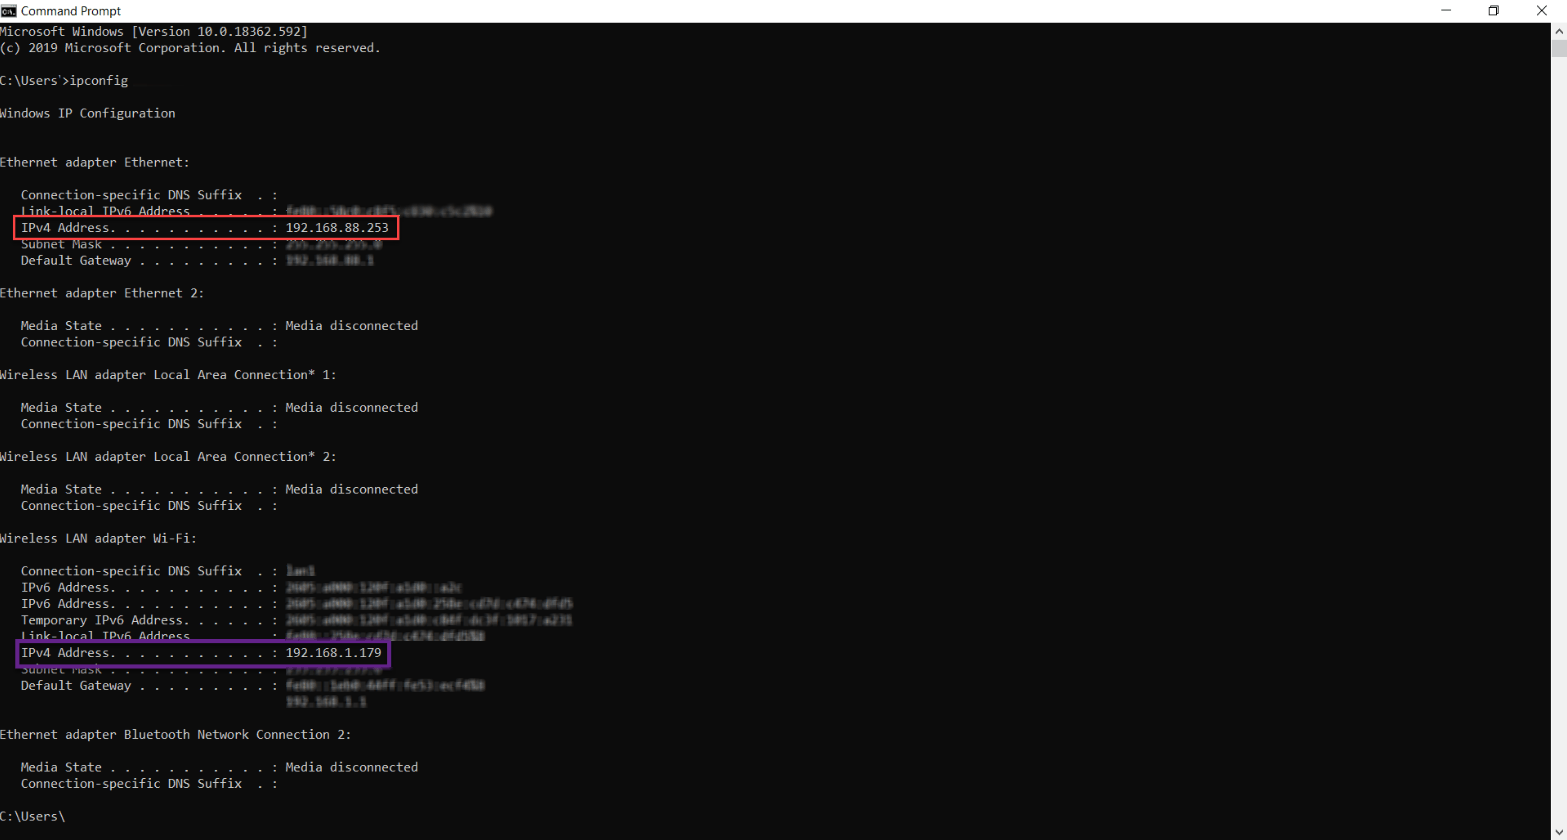
Once the Command Prompt window is open, type in “ipconfig”, and then hit the Enter key on your keyboard. If your PC is connected to multiple networks as seen in the image below then ensure you are gathering the IPv4 Address from the ethernet adapter section as seen within the red box below.
You may also use WIFI to wirelessly connect the BioLab computer to your local network. This configuration is not normally recommended as these events are likely to be delayed more than those sent using a wired ethernet connection. Additionally, a temporary interruption in wireless connection could result in the loss of any events that occur during this period. If a wireless connection is necessary you may use the IPv4 Address found within the purple box below.
Setting Up UDP Commands in BioLab
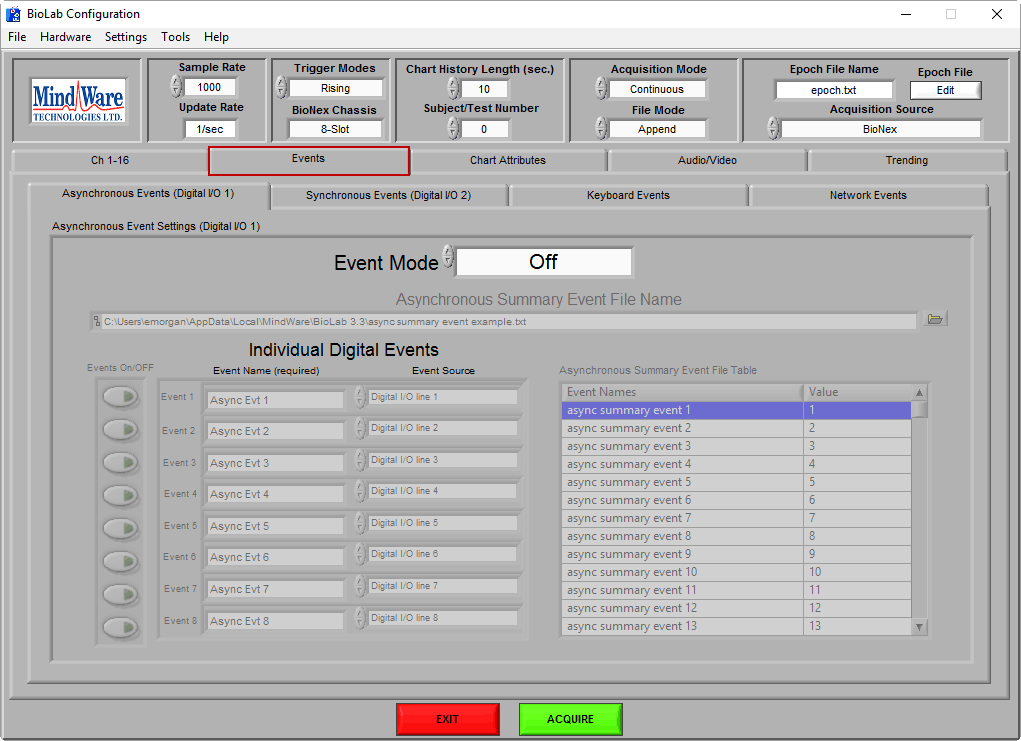
While at the data acquisition PC let’s enable BioLab to receive the events from E-Prime. To configure BioLab to receive UDP commands, launch BioLab and navigate to the Events tab on the Configuration screen.
Next, navigate to the Network Events sub-tab and enable the UDP Events button.
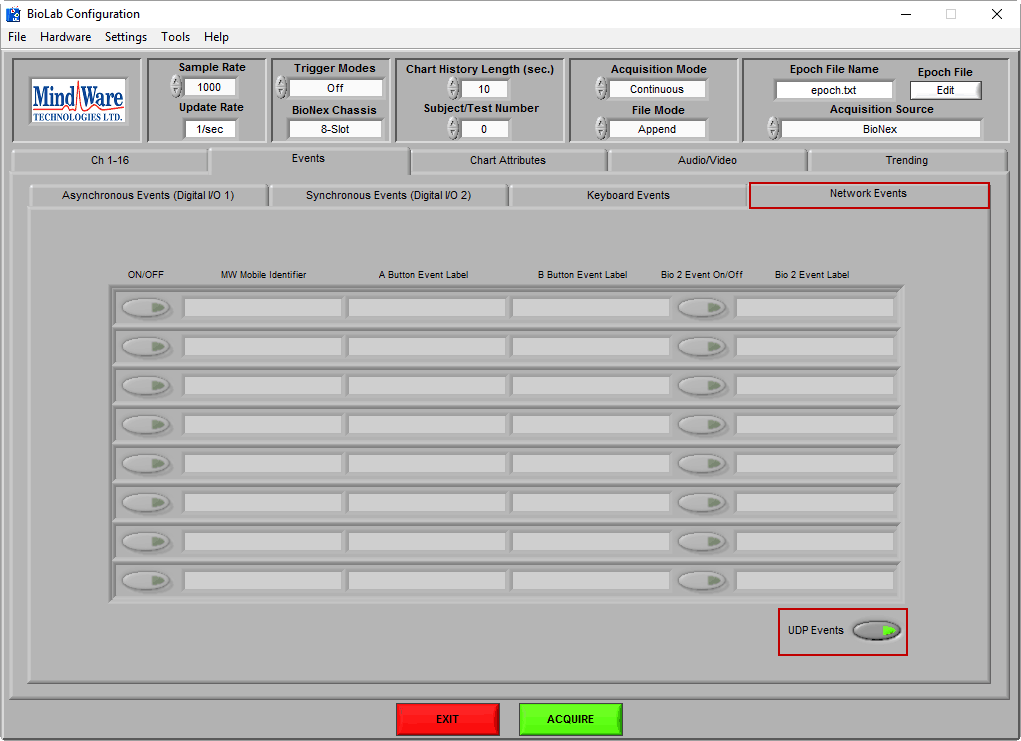
BioLab is now configured to start, stop, and log events from UDP commands. Note: When using hardware triggering, the START command is disabled
UDP Commands Overview
Now that you have captured the machine address from the data acquisition PC running BioLab it is time to move over to the stimulus presentation PC running E-Prime.
There are 4 UDP commands available, which need to be sent to the computer running BioLab on port 1776:
START – Starts BioLab acquisition
STOP – Stops BioLab acquisition
E:Event Source,Event Value,0 – Logs an event. It consists of 3 fields:
Event Source is used to group similar events.
Event Value is a unique value describing an instance of an event.
0 denotes the end of an event command.
PING – Checks if BioLab is listening for UDP commands. BioLab will respond with PONG Note: Commands must be sent one per packet, exactly as defined, with no newline or other characters included. More information on UDP Commands can be found in the BioLab User Guide.
Setting up a Socket Device in E-Prime
First, open the experiment file you want to use to send UDP commands in E-Studio. Double-click the top level Experiment Object to open the Experiment Object Properties. Next, click the Devices tab and press Add… to set up a new device.
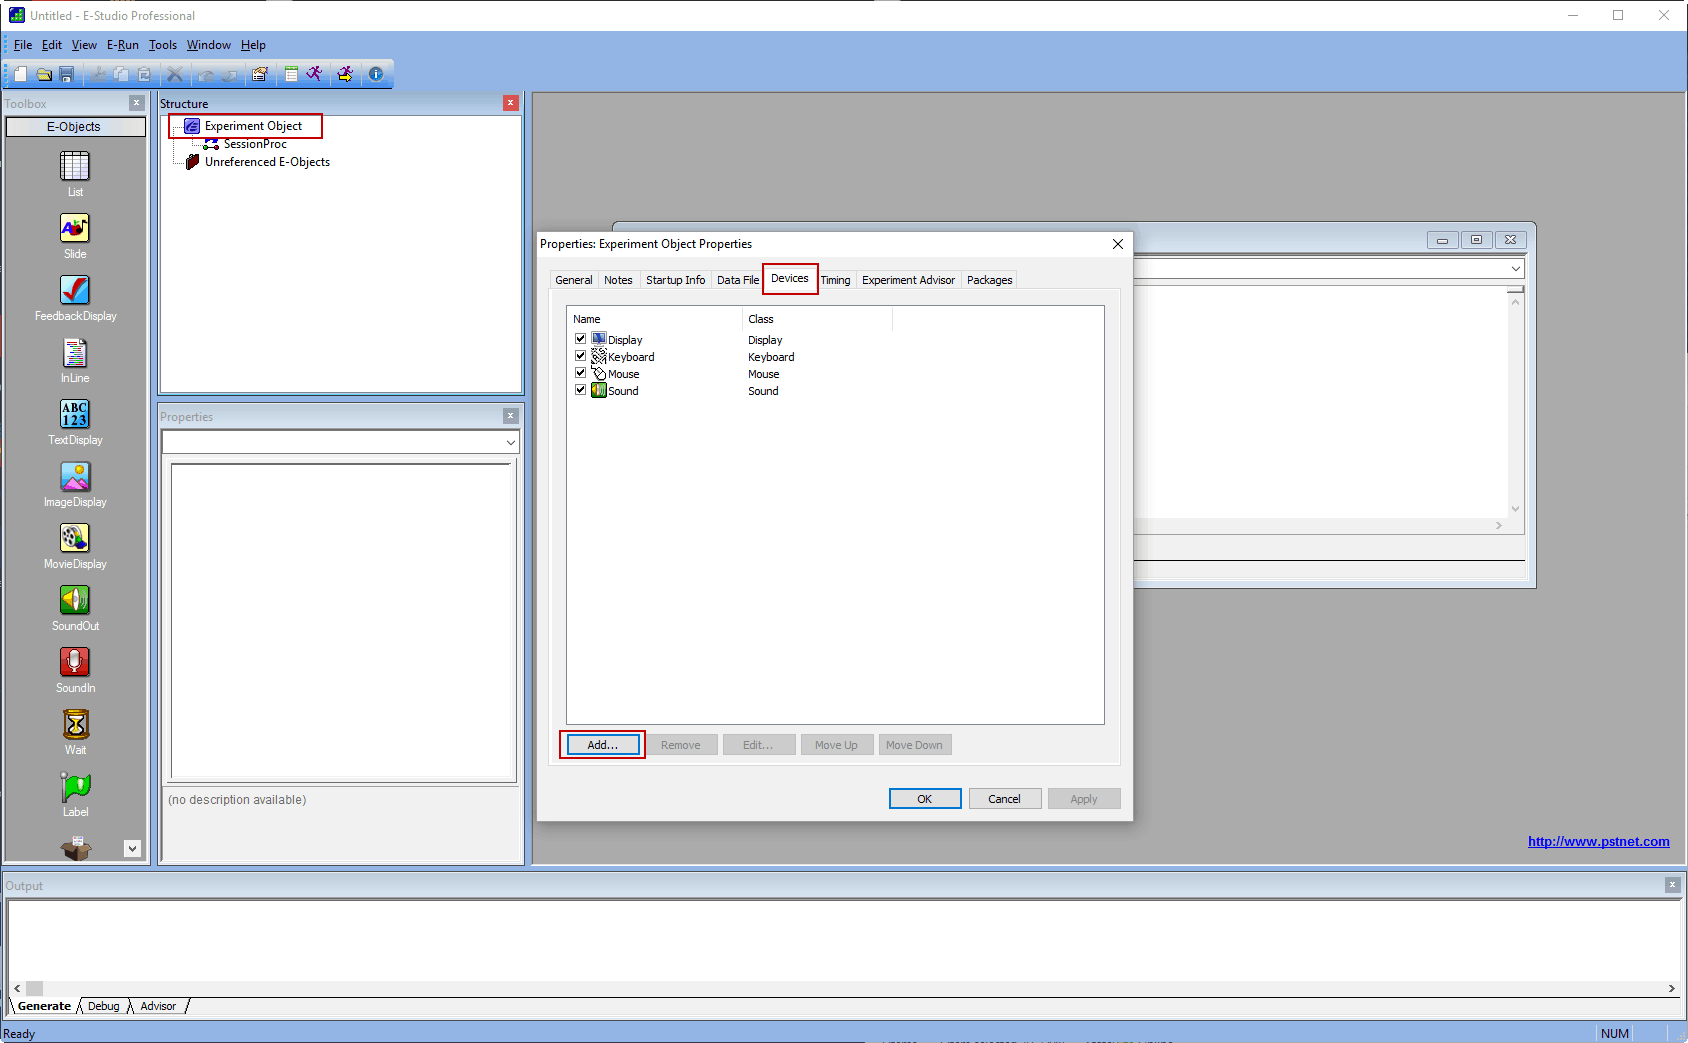
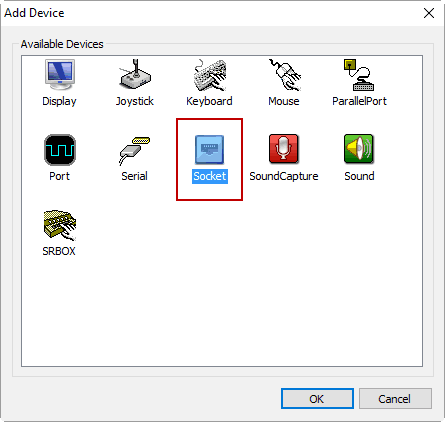
From the Devices page, choose the Socket device type and press OK to add it. Once added, double-click it in the Devices list to edit it.
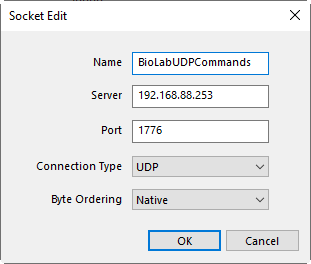
You should name it something to identify it as the device used to send BioLab UDP commands. Set Server to the machine address that was recorded in the previous section, Port to 1776, and Connection Type to UDP and then press OK to save these changes. Finally, press OK again to close the Experiment Object Properties screen. The network device is now set up and ready to use.
Sending UDP Commands Using Task Events
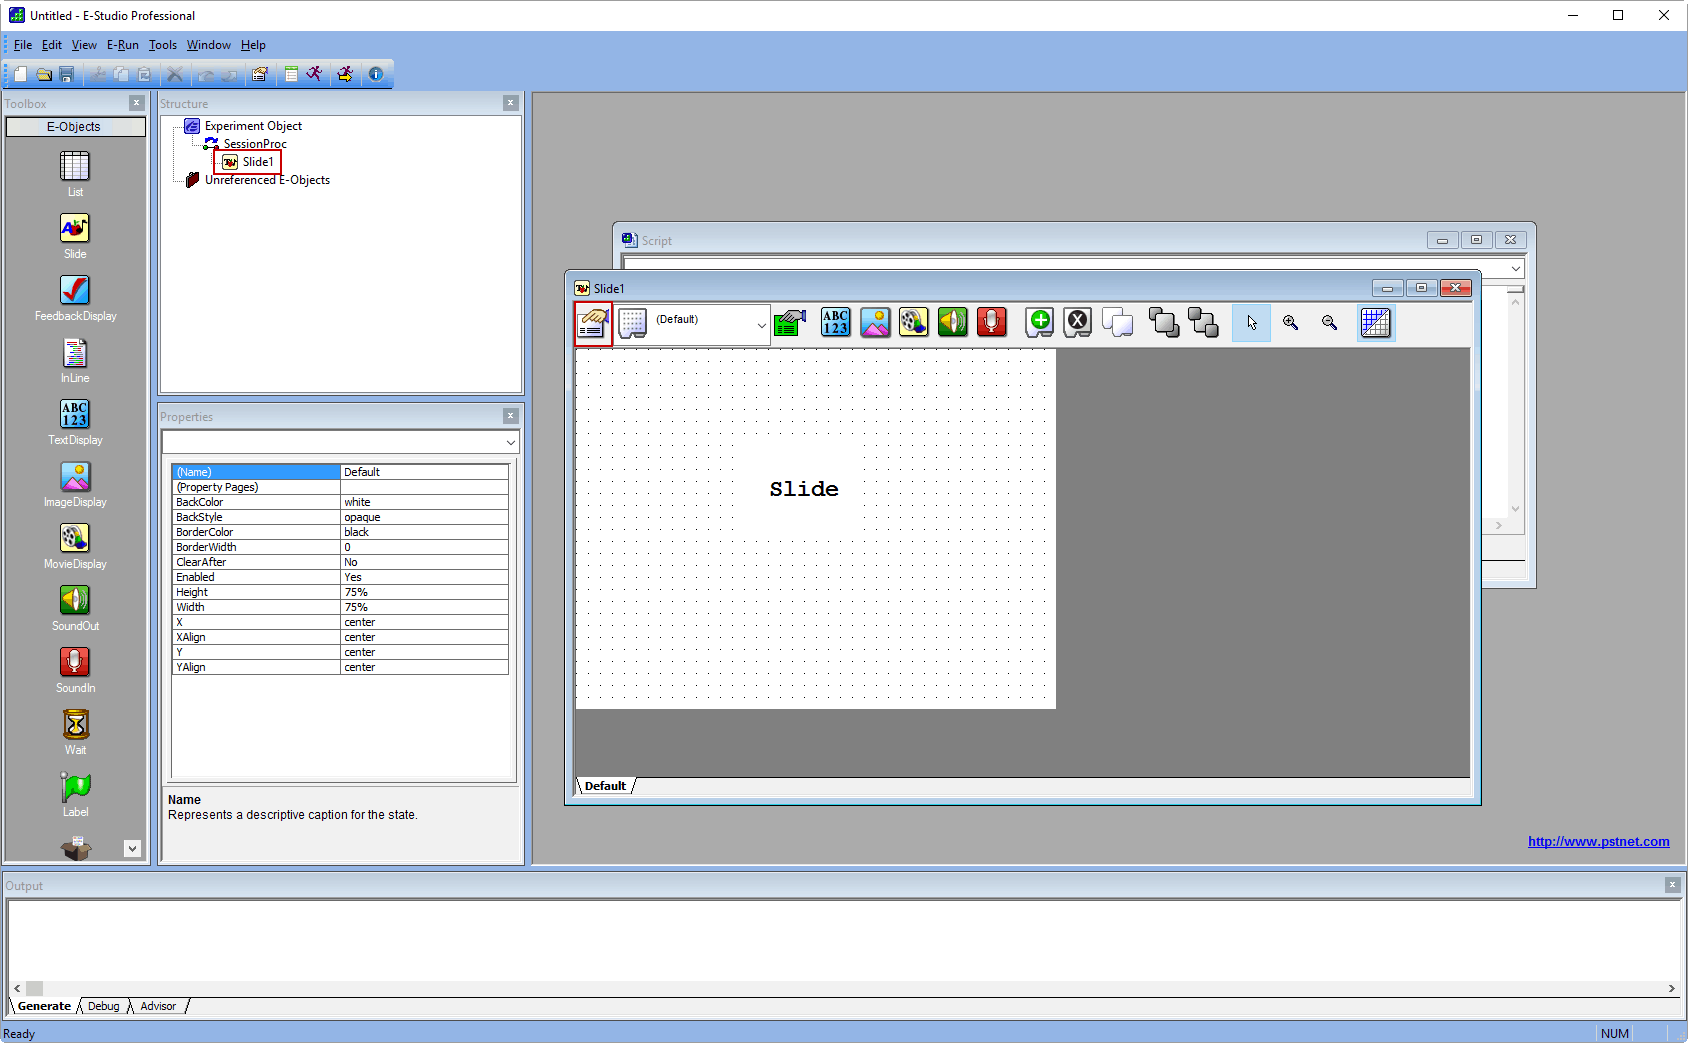
Task events allow you to perform a task at a specified time in reference to the presentation of an E-Object in the experiment. This is the mechanism we will use to send UDP commands using our newly configured Socket device. Double click the E-Object from which you want to send UDP commands, and click the Property Pages button to launch the properties for that object. For this example, we are using a Slide object.
Navigate to the Task Events tab and press the Add… button to create a task event.
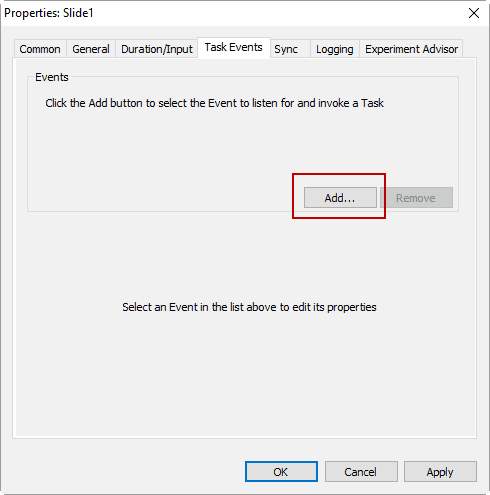
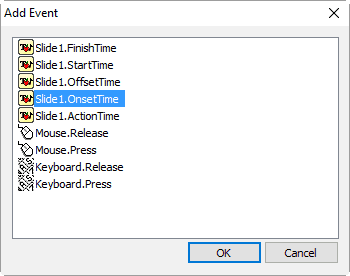
You can set your task event to occur at a variety of times within the duration of a slide. For this example, we are going to use OnsetTime, meaning this event will occur at the onset time of this slide. Double click the desired event type to return to the Properties page.
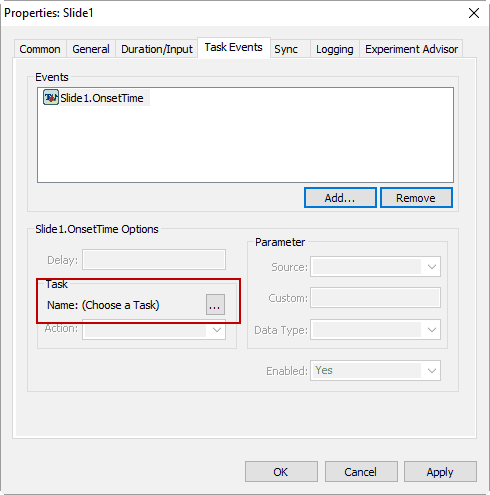
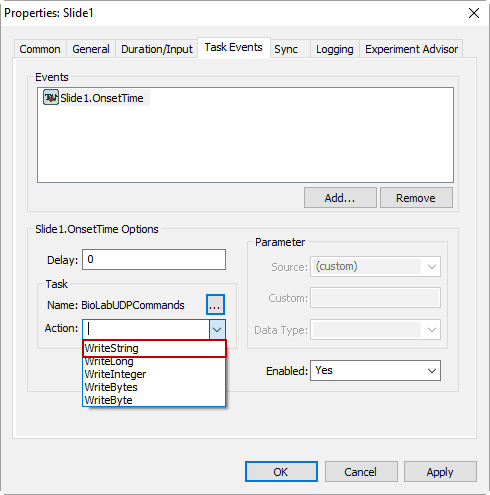
Back on the Properties page, we now need to specify what action will occur with the onset of this slide. Click the … button to choose which device to use in this event.
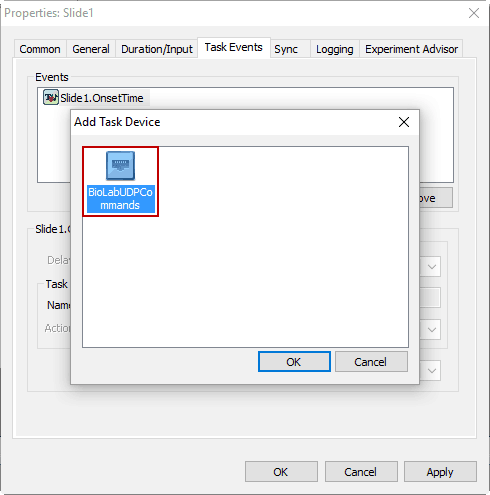
Select the Socket device we set up earlier by double-clicking it.
All UDP commands are text-based, so we want to select the WriteString option from the Action selector.
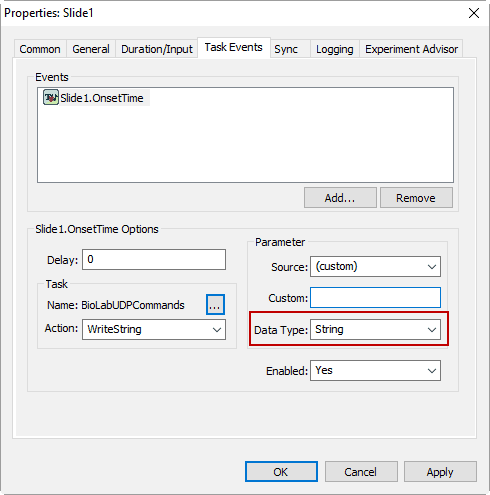
Next, change the Data Type to String
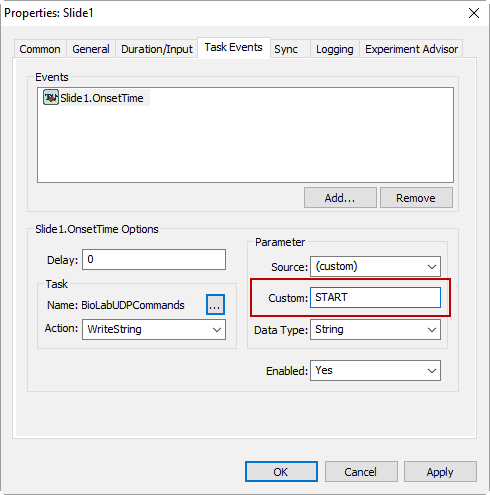
At this point, we can fill in our command in the Custom field. We can start acquisition
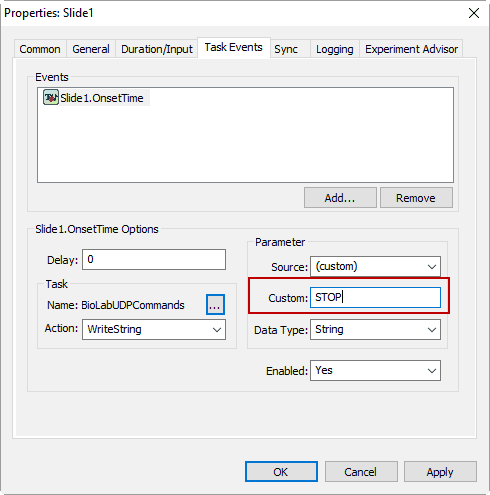
stop acquisition
and log events.
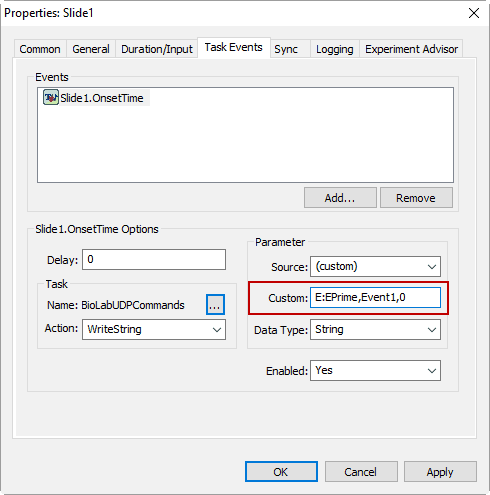
Press OK to finish setting task events for the slide. Do this for as many UDP commands you want to send throughout the experiment.
UDP Event Timing Statistics
UDP timing was tested on a relatively busy network over ethernet with a Linksys (EG005W) gigabit switch as the local connection. 1000 pulses were sent across 4 different sessions with a width of 500 ms.
Max Delay: 245 ms
Min Delay: 0 ms
Average Delay: 6.2 ms
Standard Deviation: 22.2 ms
Note: If millisecond precision is required, please ensure that you use the synchronous digital ports on the 8-slot BioNex for event capture.