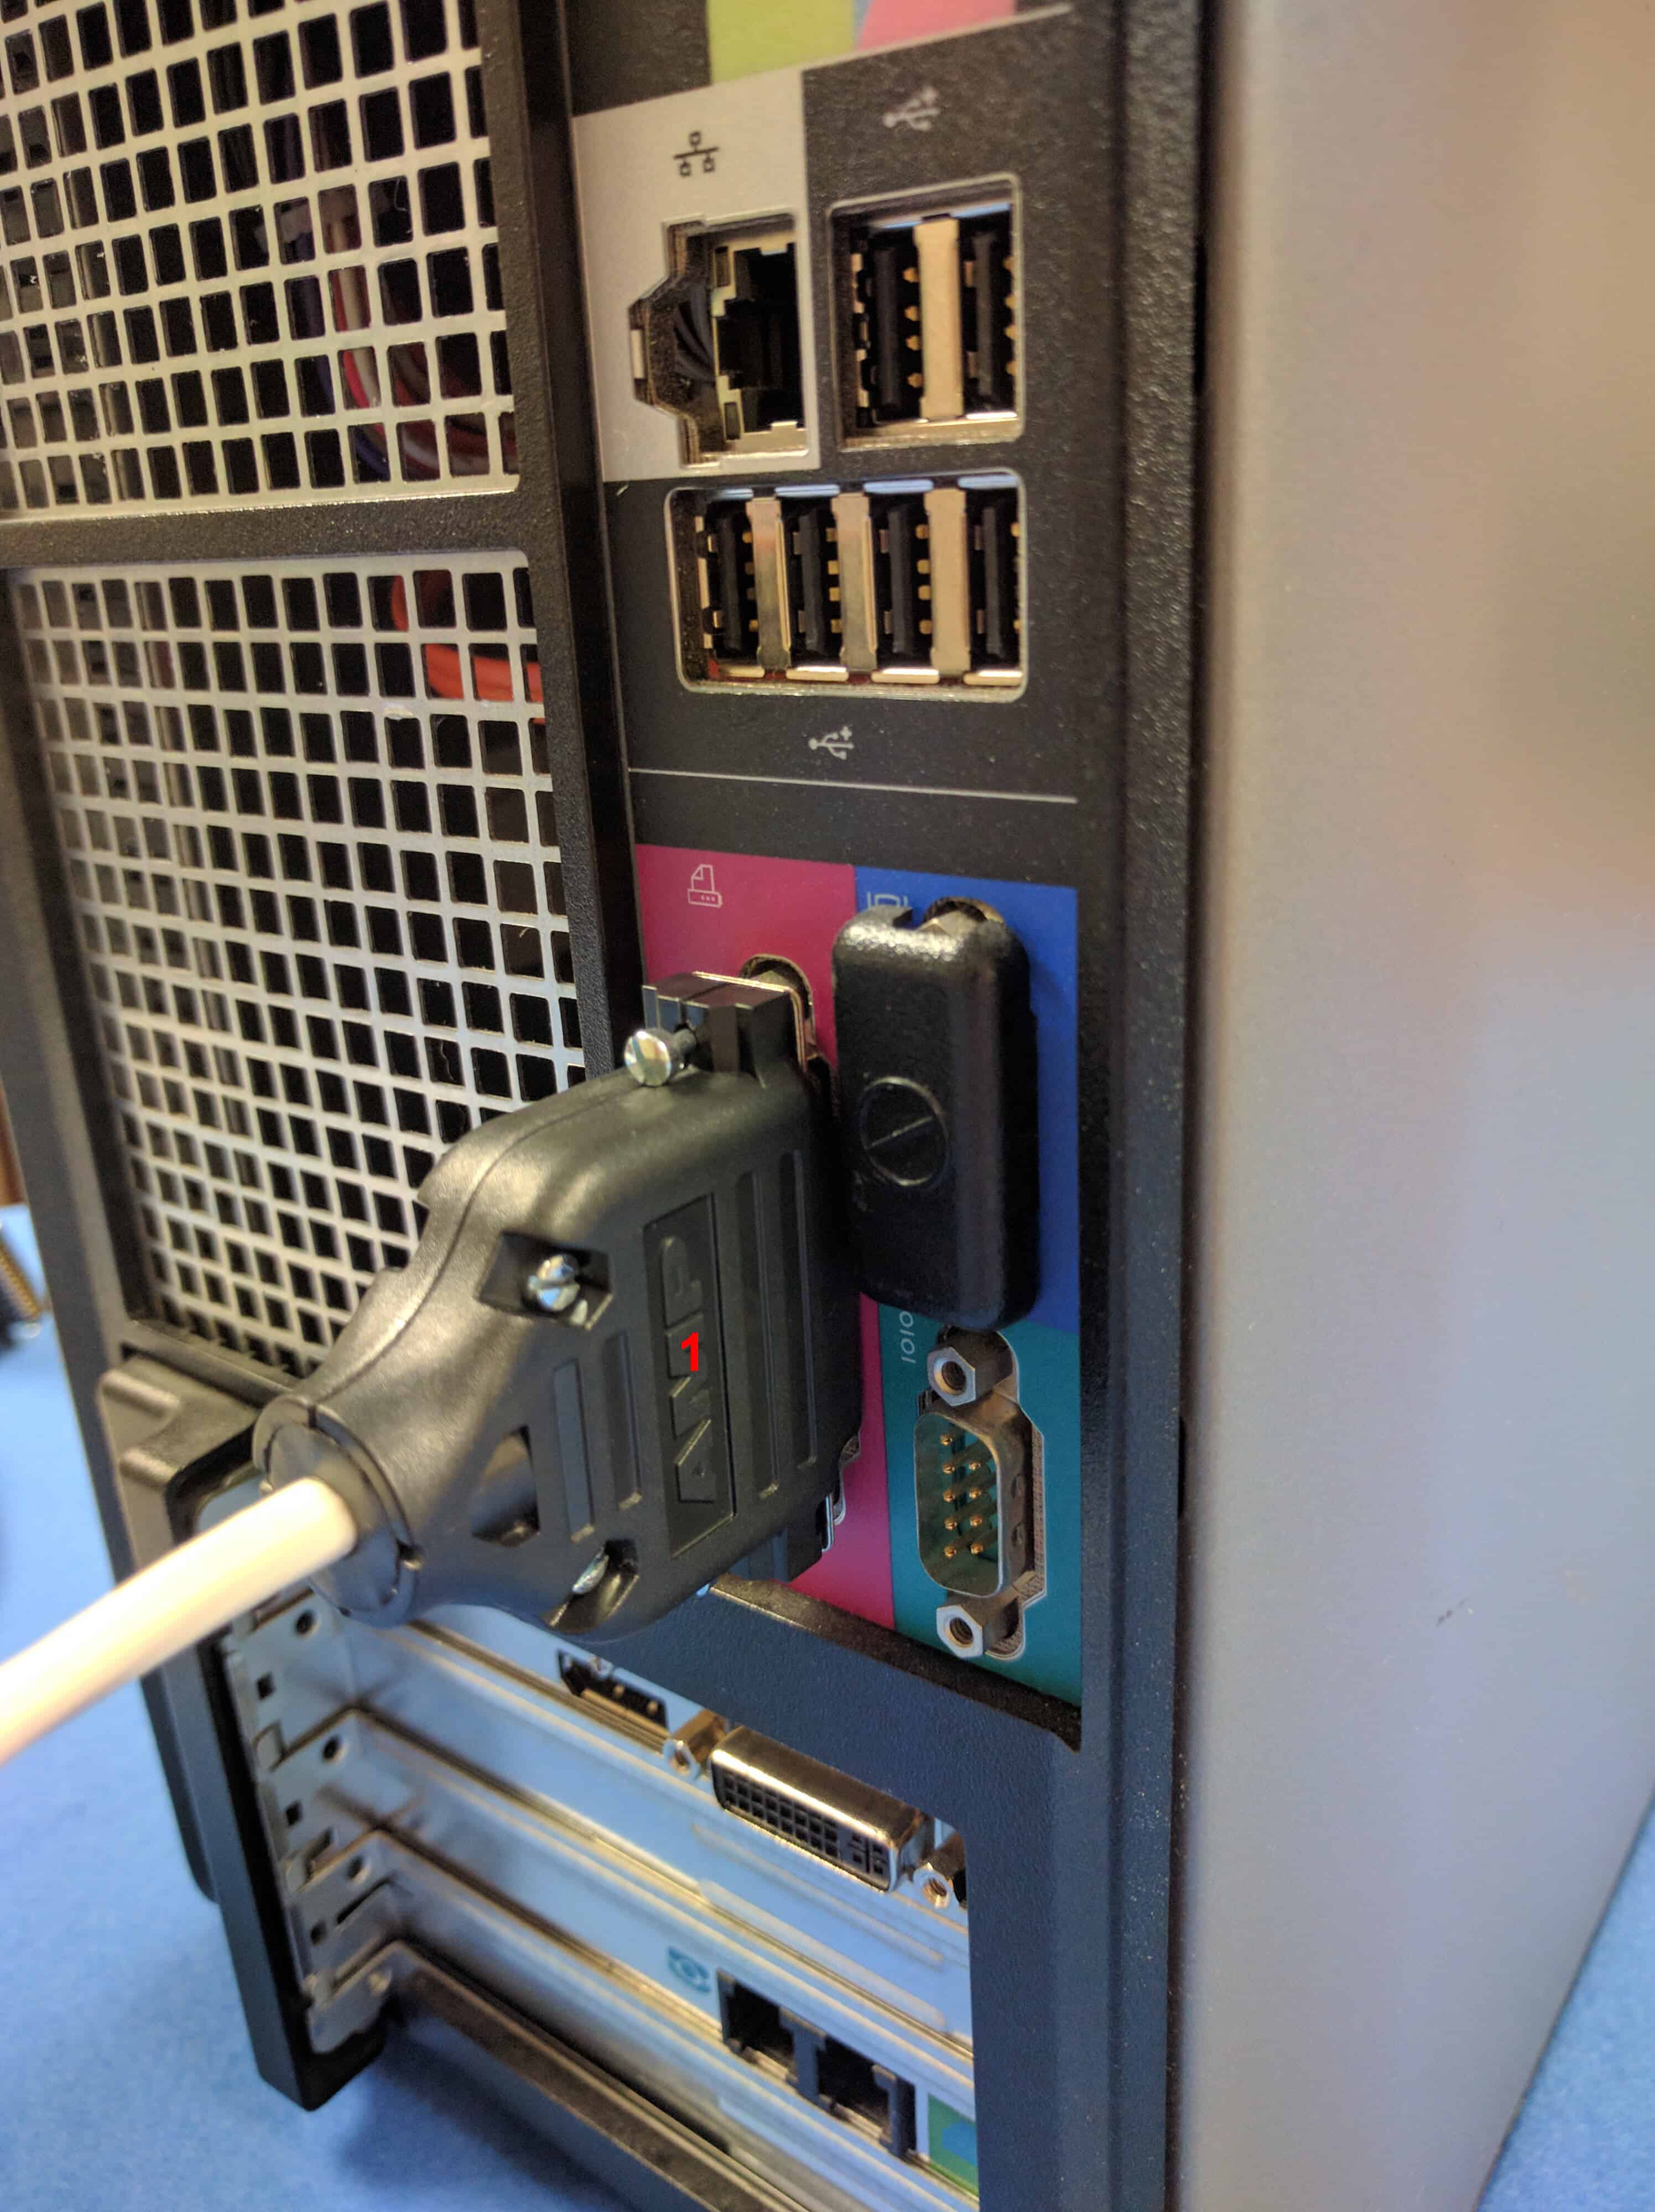
The E-Prime Trigger cable connects the computer running E-Prime by Psychology Software Tools, Inc. (or PST) to the MindWare data acquisition hardware. This allows E-Prime to trigger the start of data acquisition and transmit digital signals for event logging in BioLab. This cable can be used for any stimulus software that can output signals on the parallel port.
The E-Prime Trigger Cable
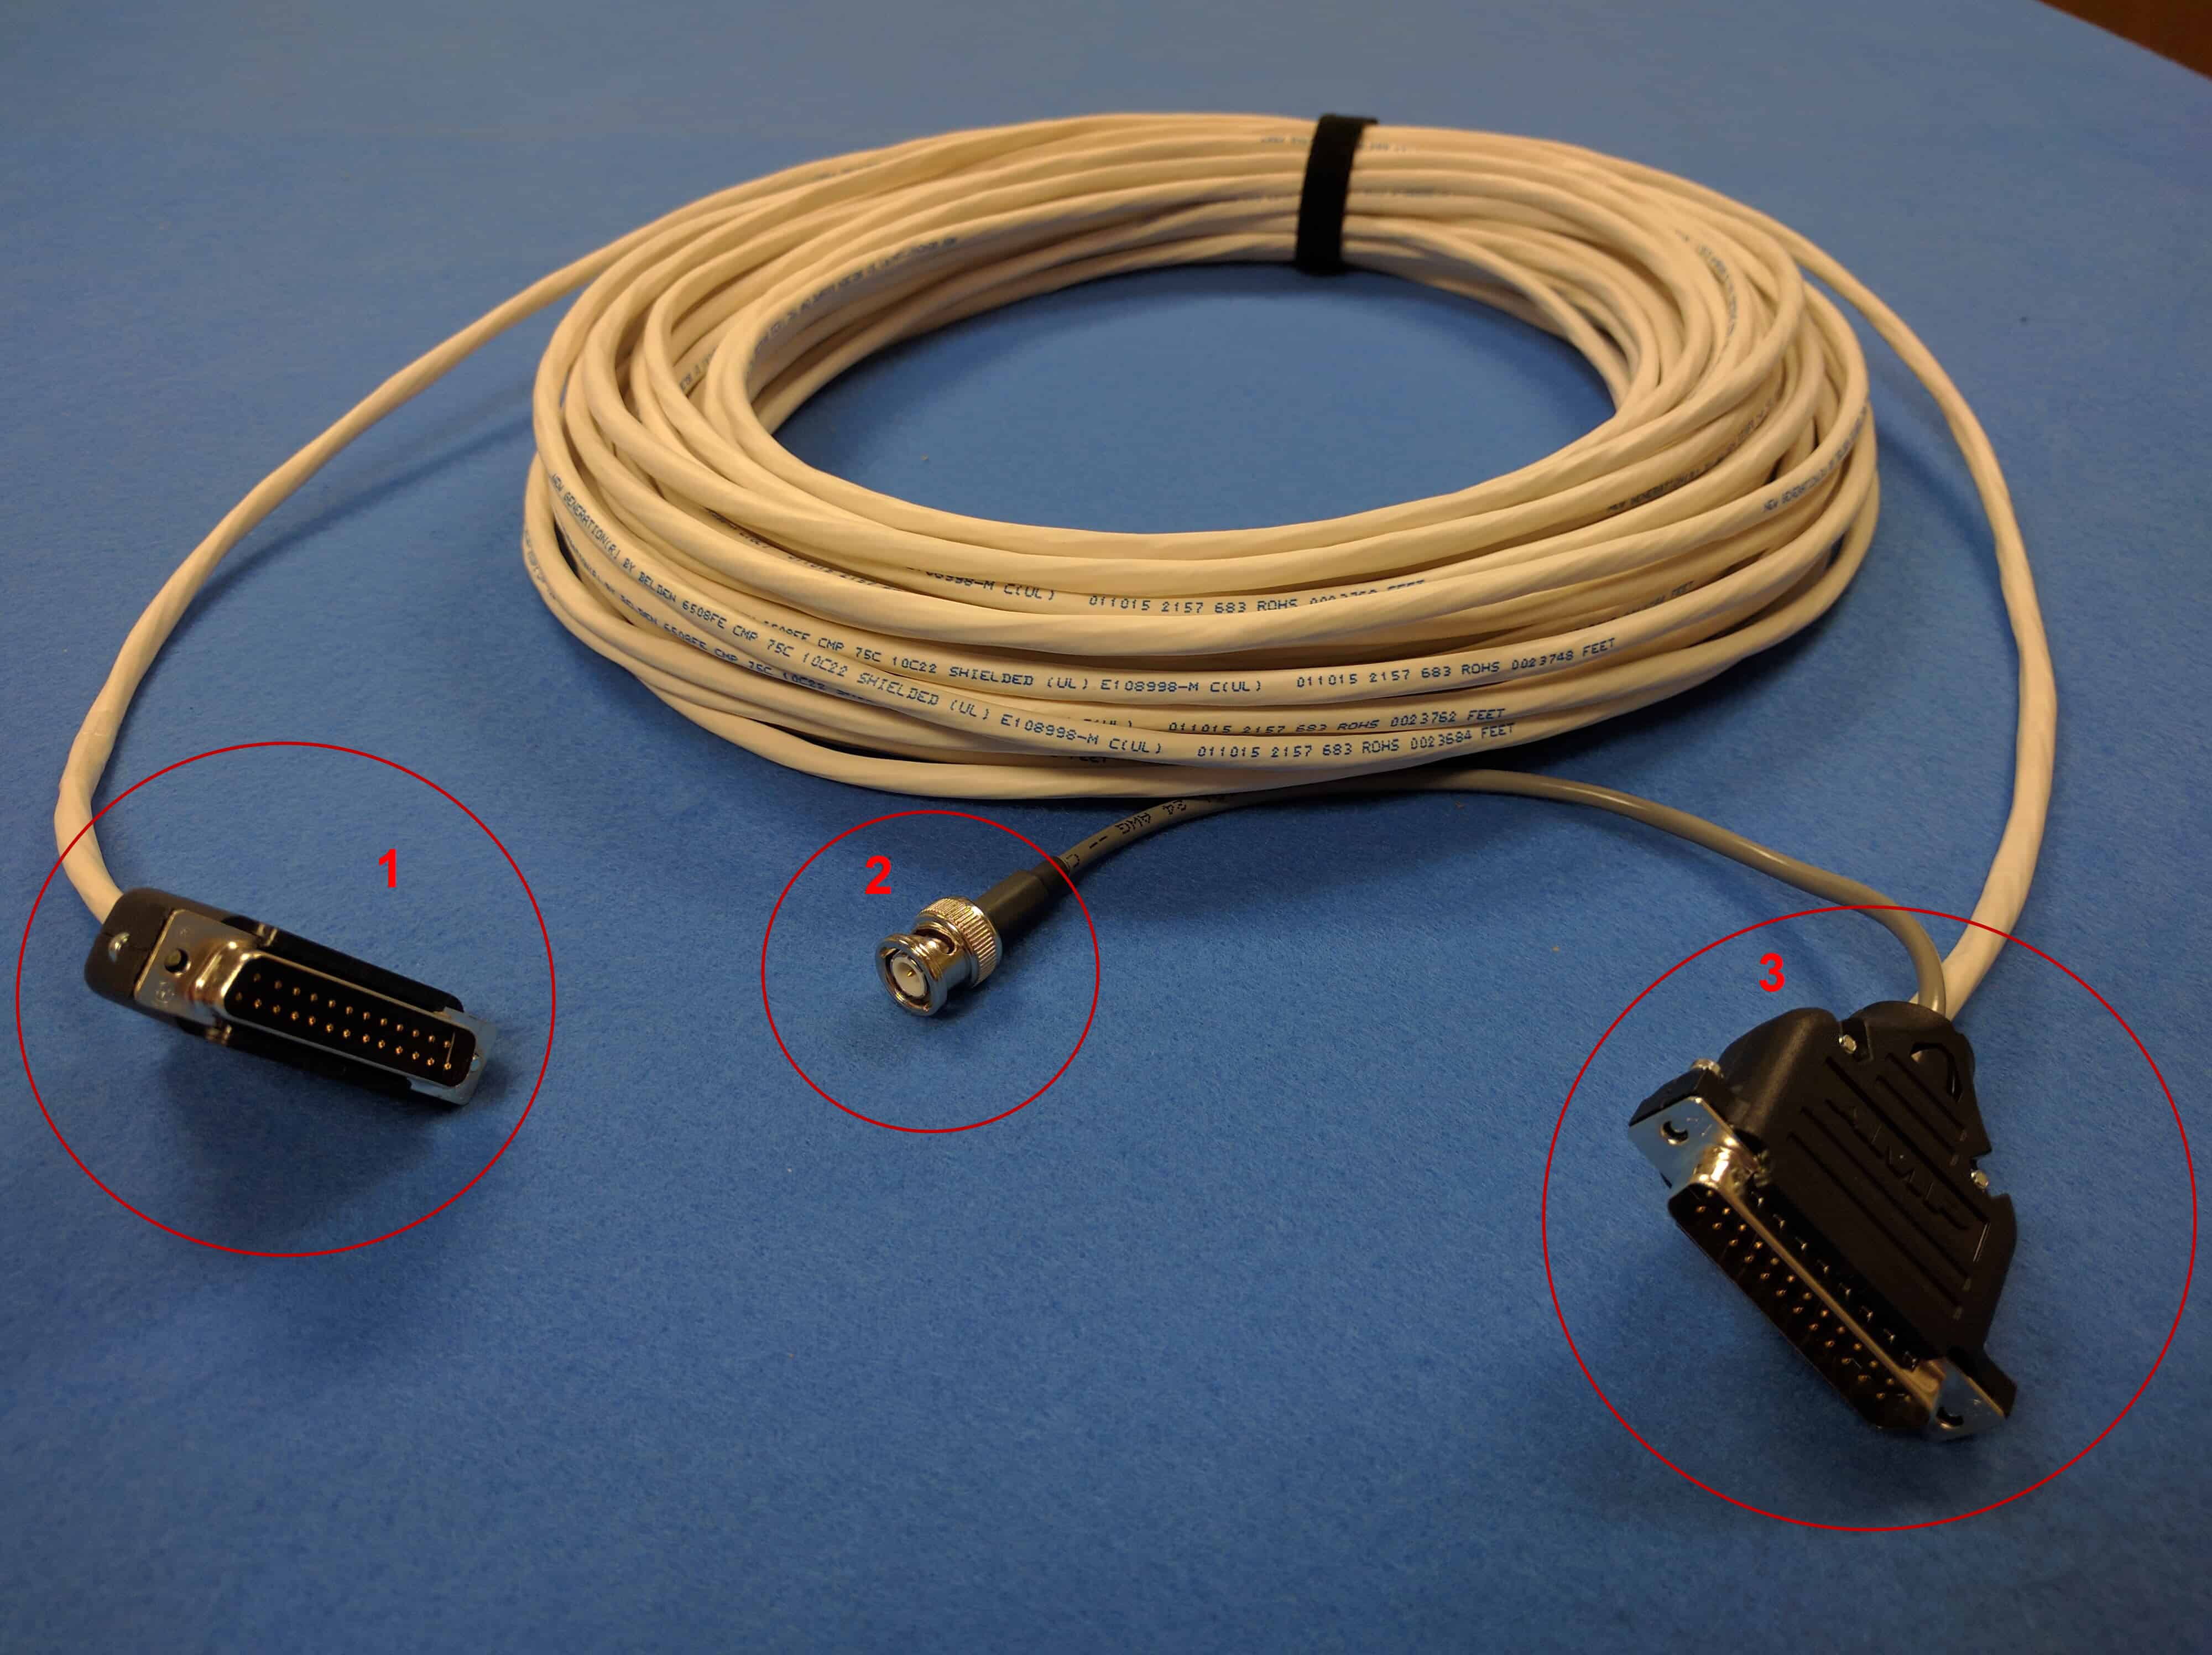
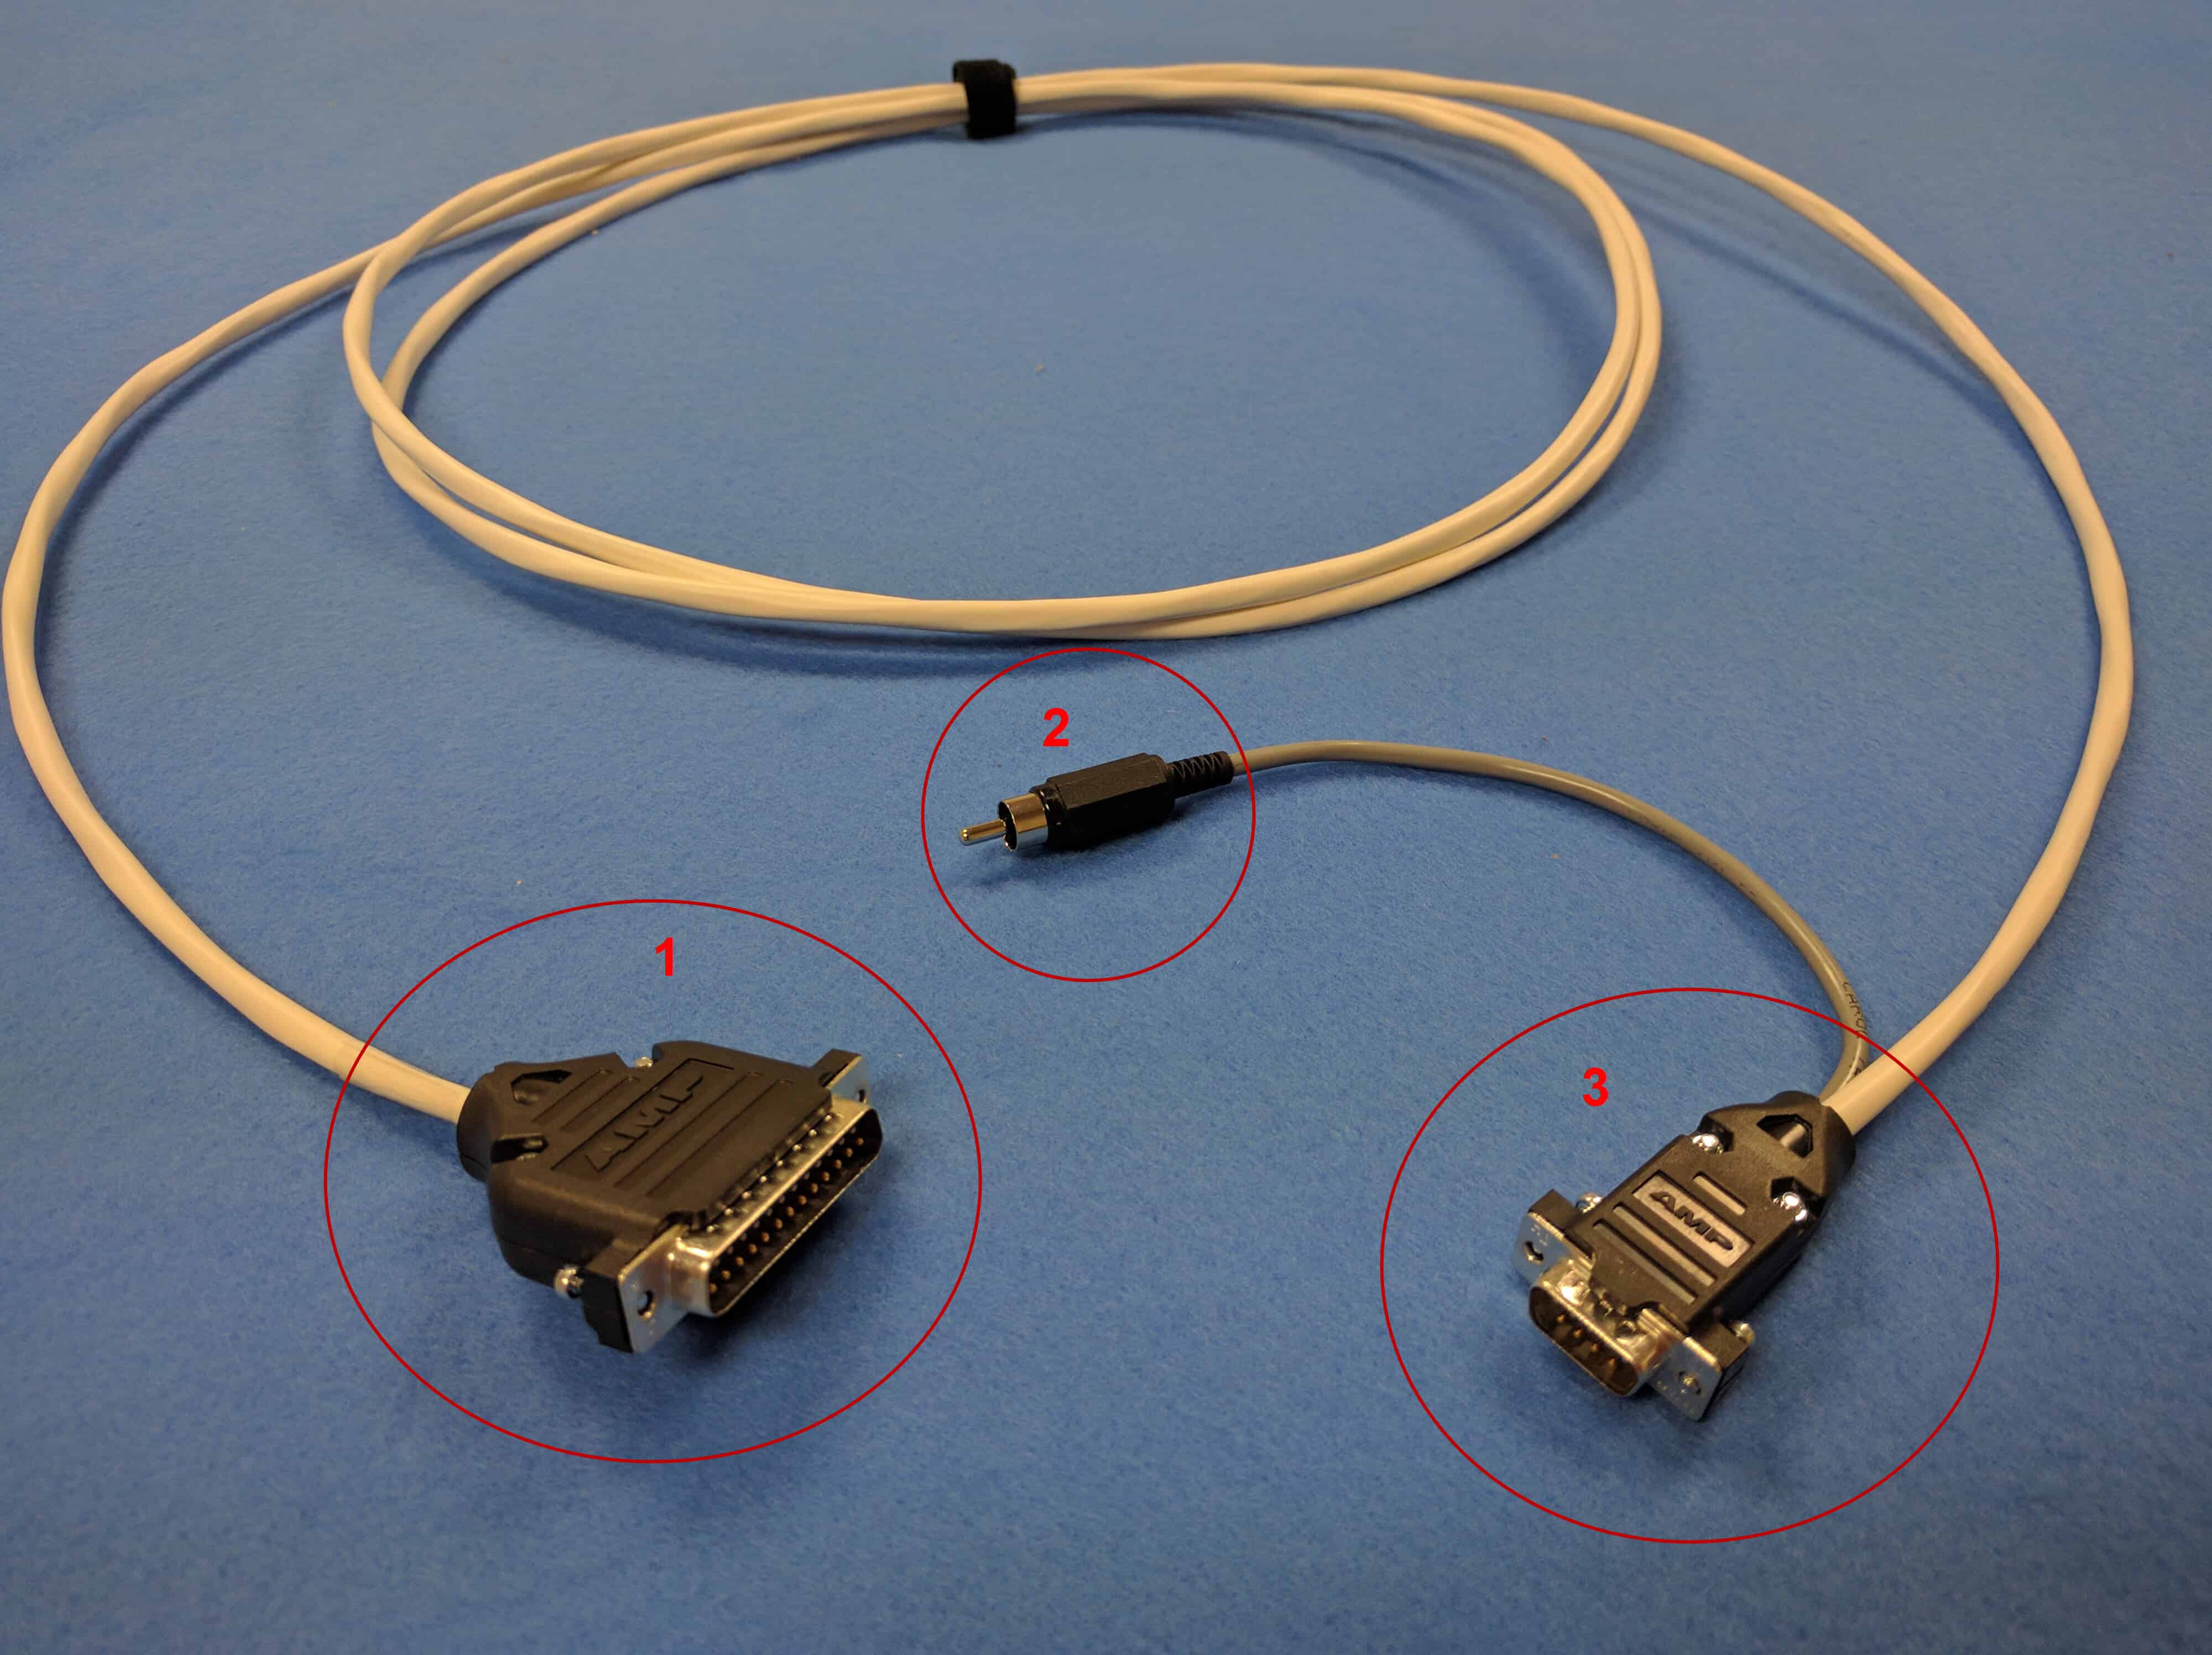
There are 2 types of E-Prime Trigger cables – one for interfacing with the 8-slot BioNex, and one for interfacing with the 2-slot BioNex and Wireless Data Center. Each of these cables consists of 3 connectors.
E-Prime Trigger Cable for 8-slot BioNex
Connector 1 is a male DB-25 connector which should be plugged into the parallel port of the computer running E-Prime.
Connector 2 is a male BNC (pictured) or RCA (not pictured) connector which is used to trigger the start of acquisition.
Connector 3 is another male DB-25 connector which is used for capturing digital events. It should be plugged into the Digital I/O port on the BioNex 8-slot.
E-Prime Trigger Cable for 2-slot BioNex
Connector 1 is a male DB-25 connector which should be plugged into the parallel port of the computer running E-Prime.
Connector 2 is a male BNC (not pictured) or RCA (pictured) connector which is used to trigger the start of acquisition.
Connector 3 is a male DB-9 connector which is used for capturing digital events. It should be plugged into the Digital Input port on the BioNex 2-slot or Wireless Data Center.
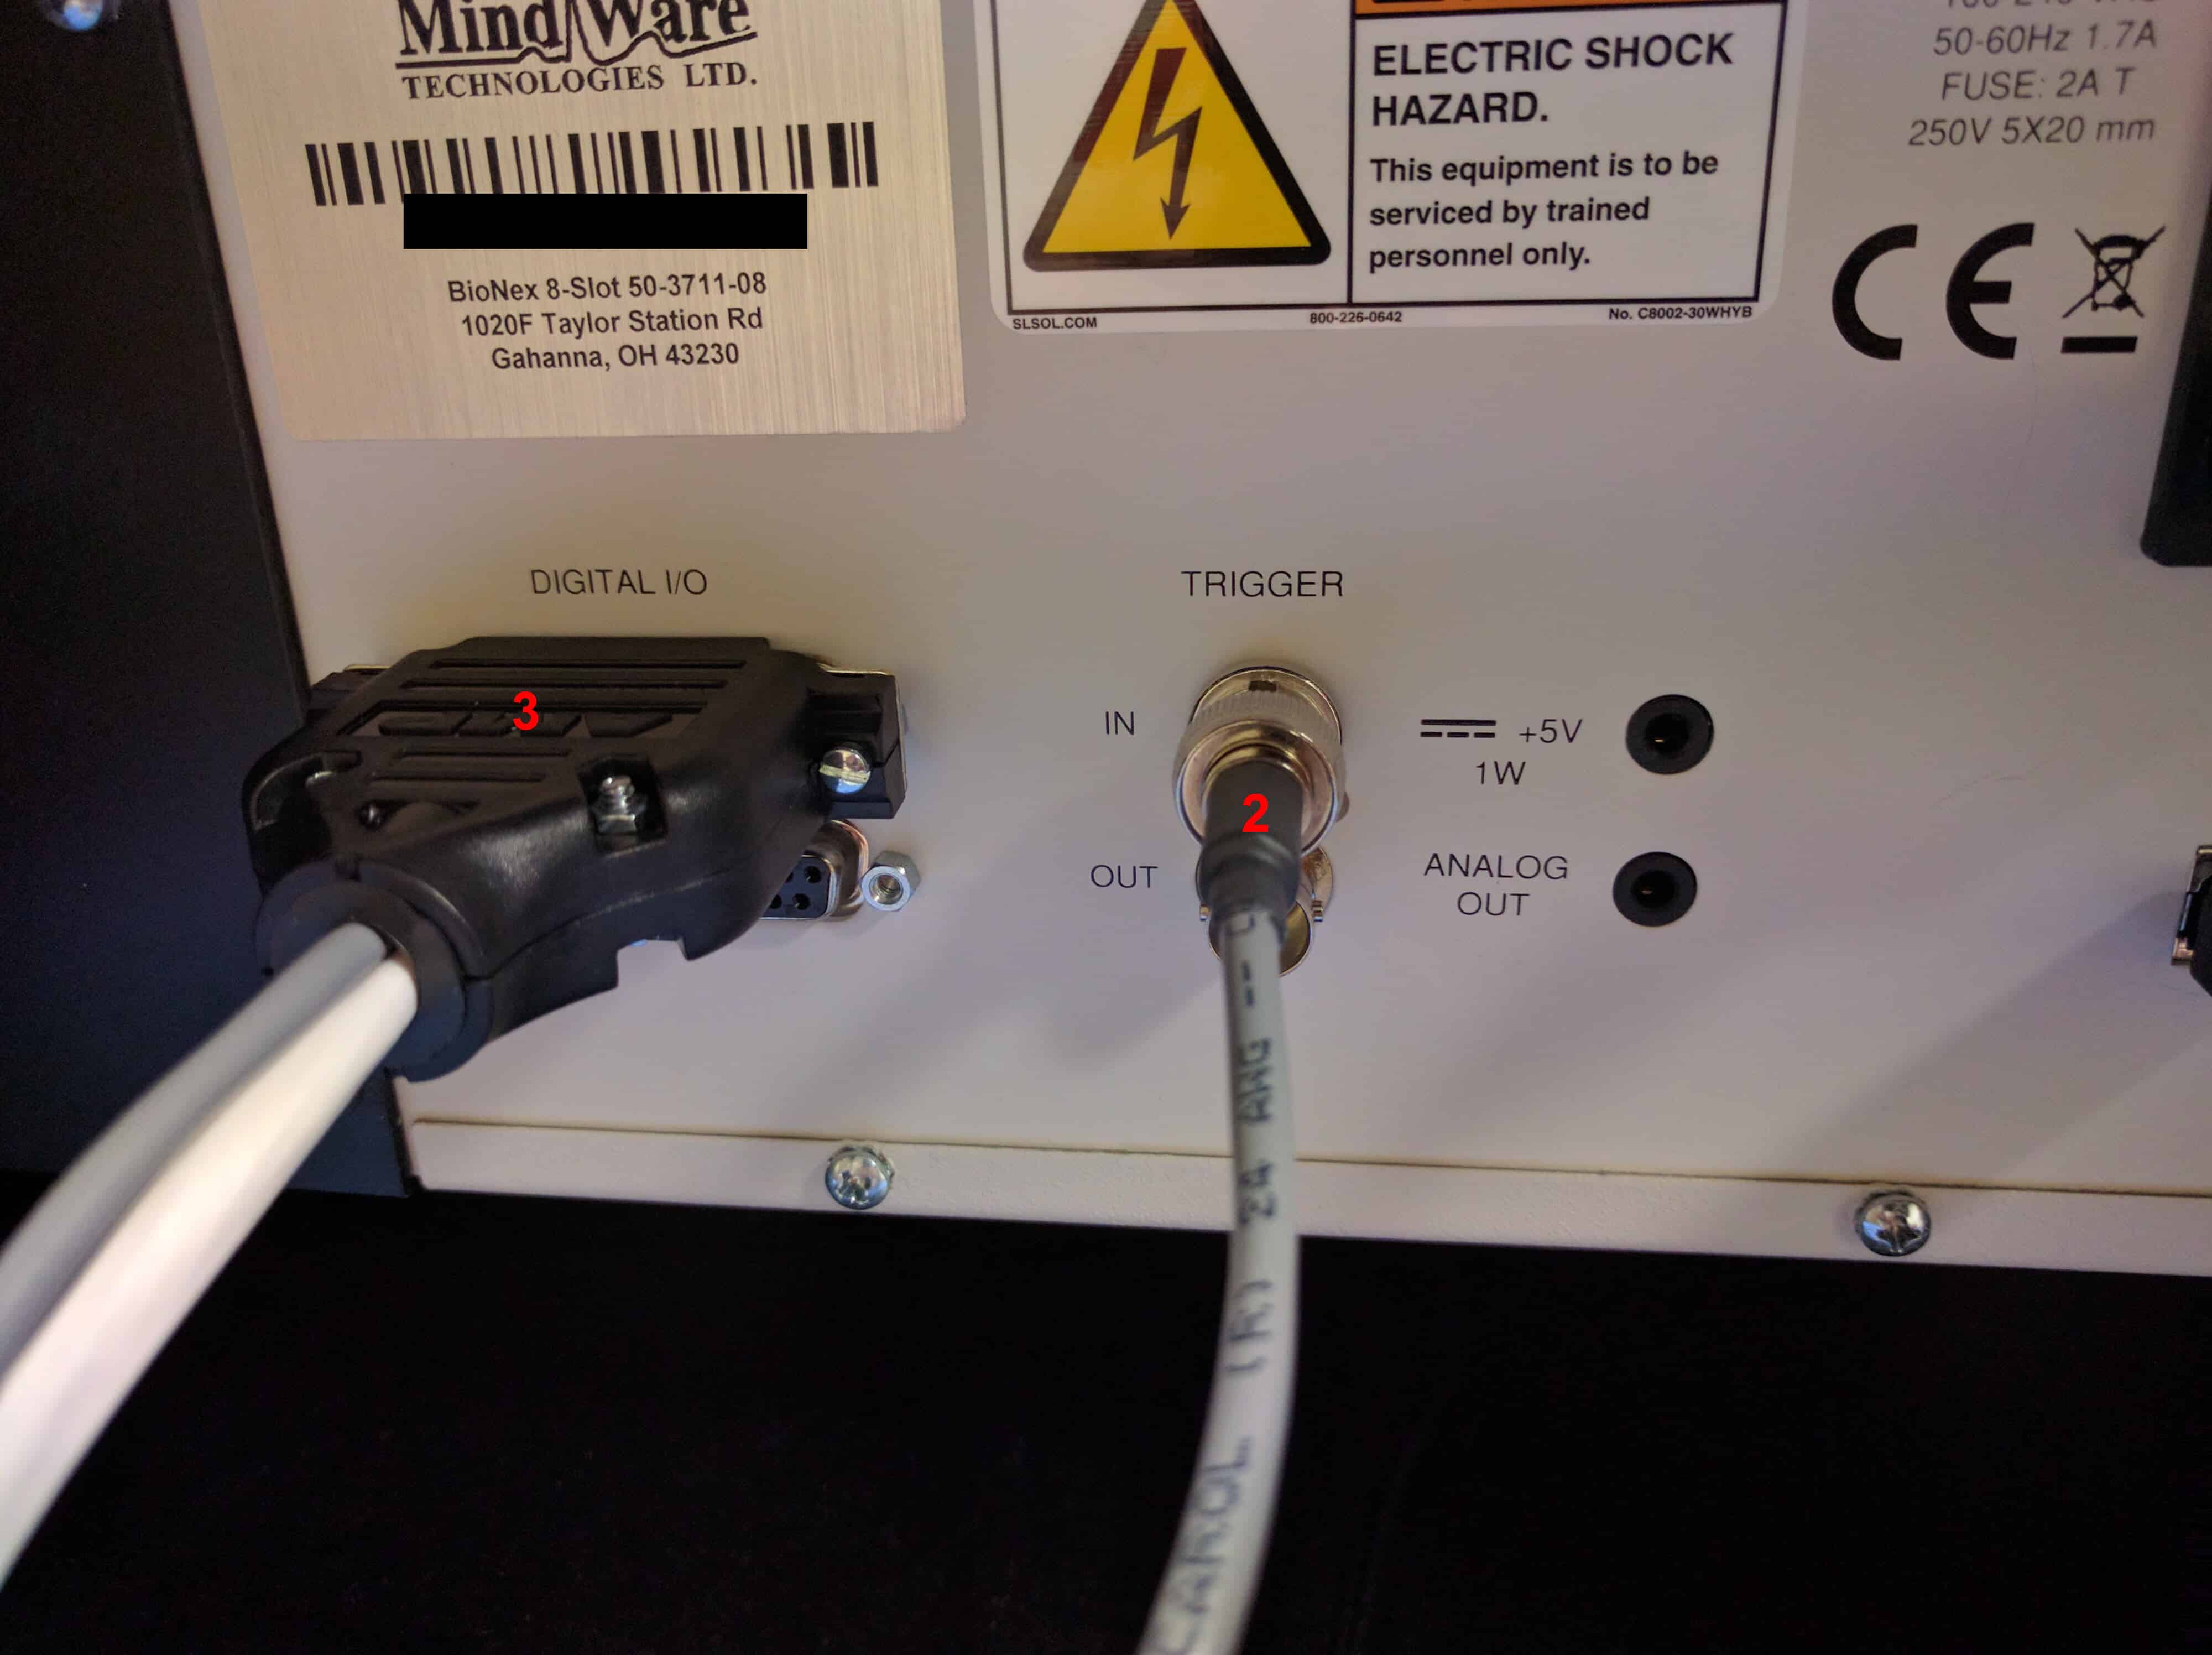
Connection to the BioNex 8-slot
Take Connector 3 on the E-Prime Trigger cable and plug it into one of the Digital I/O ports on the back of the BioNex. Be sure to plug it into the port you have configured to record events. Tighten the terminal screws on the connector to secure the connection.
Next, take Connector 2 and plug it into the Trigger In port.
Note: Connection to some BioNex systems may require the use of a BNC-to-RCA adapter to connect the Trigger In port.
Note: Older BioNex 8-slot models (3rd Gen and earlier) have two types of Digital I/O ports – Digital I/O Port 1 collects asynchronous digital events which are significantly less precise than the synchronous digital events collected on Digital I/O Port 2. Identify your generation 8-slot and ensure your E-Prime cable is plugged into the proper Digital I/O port. Generally, this should be Digital I/O Port 2 for maximum precision.
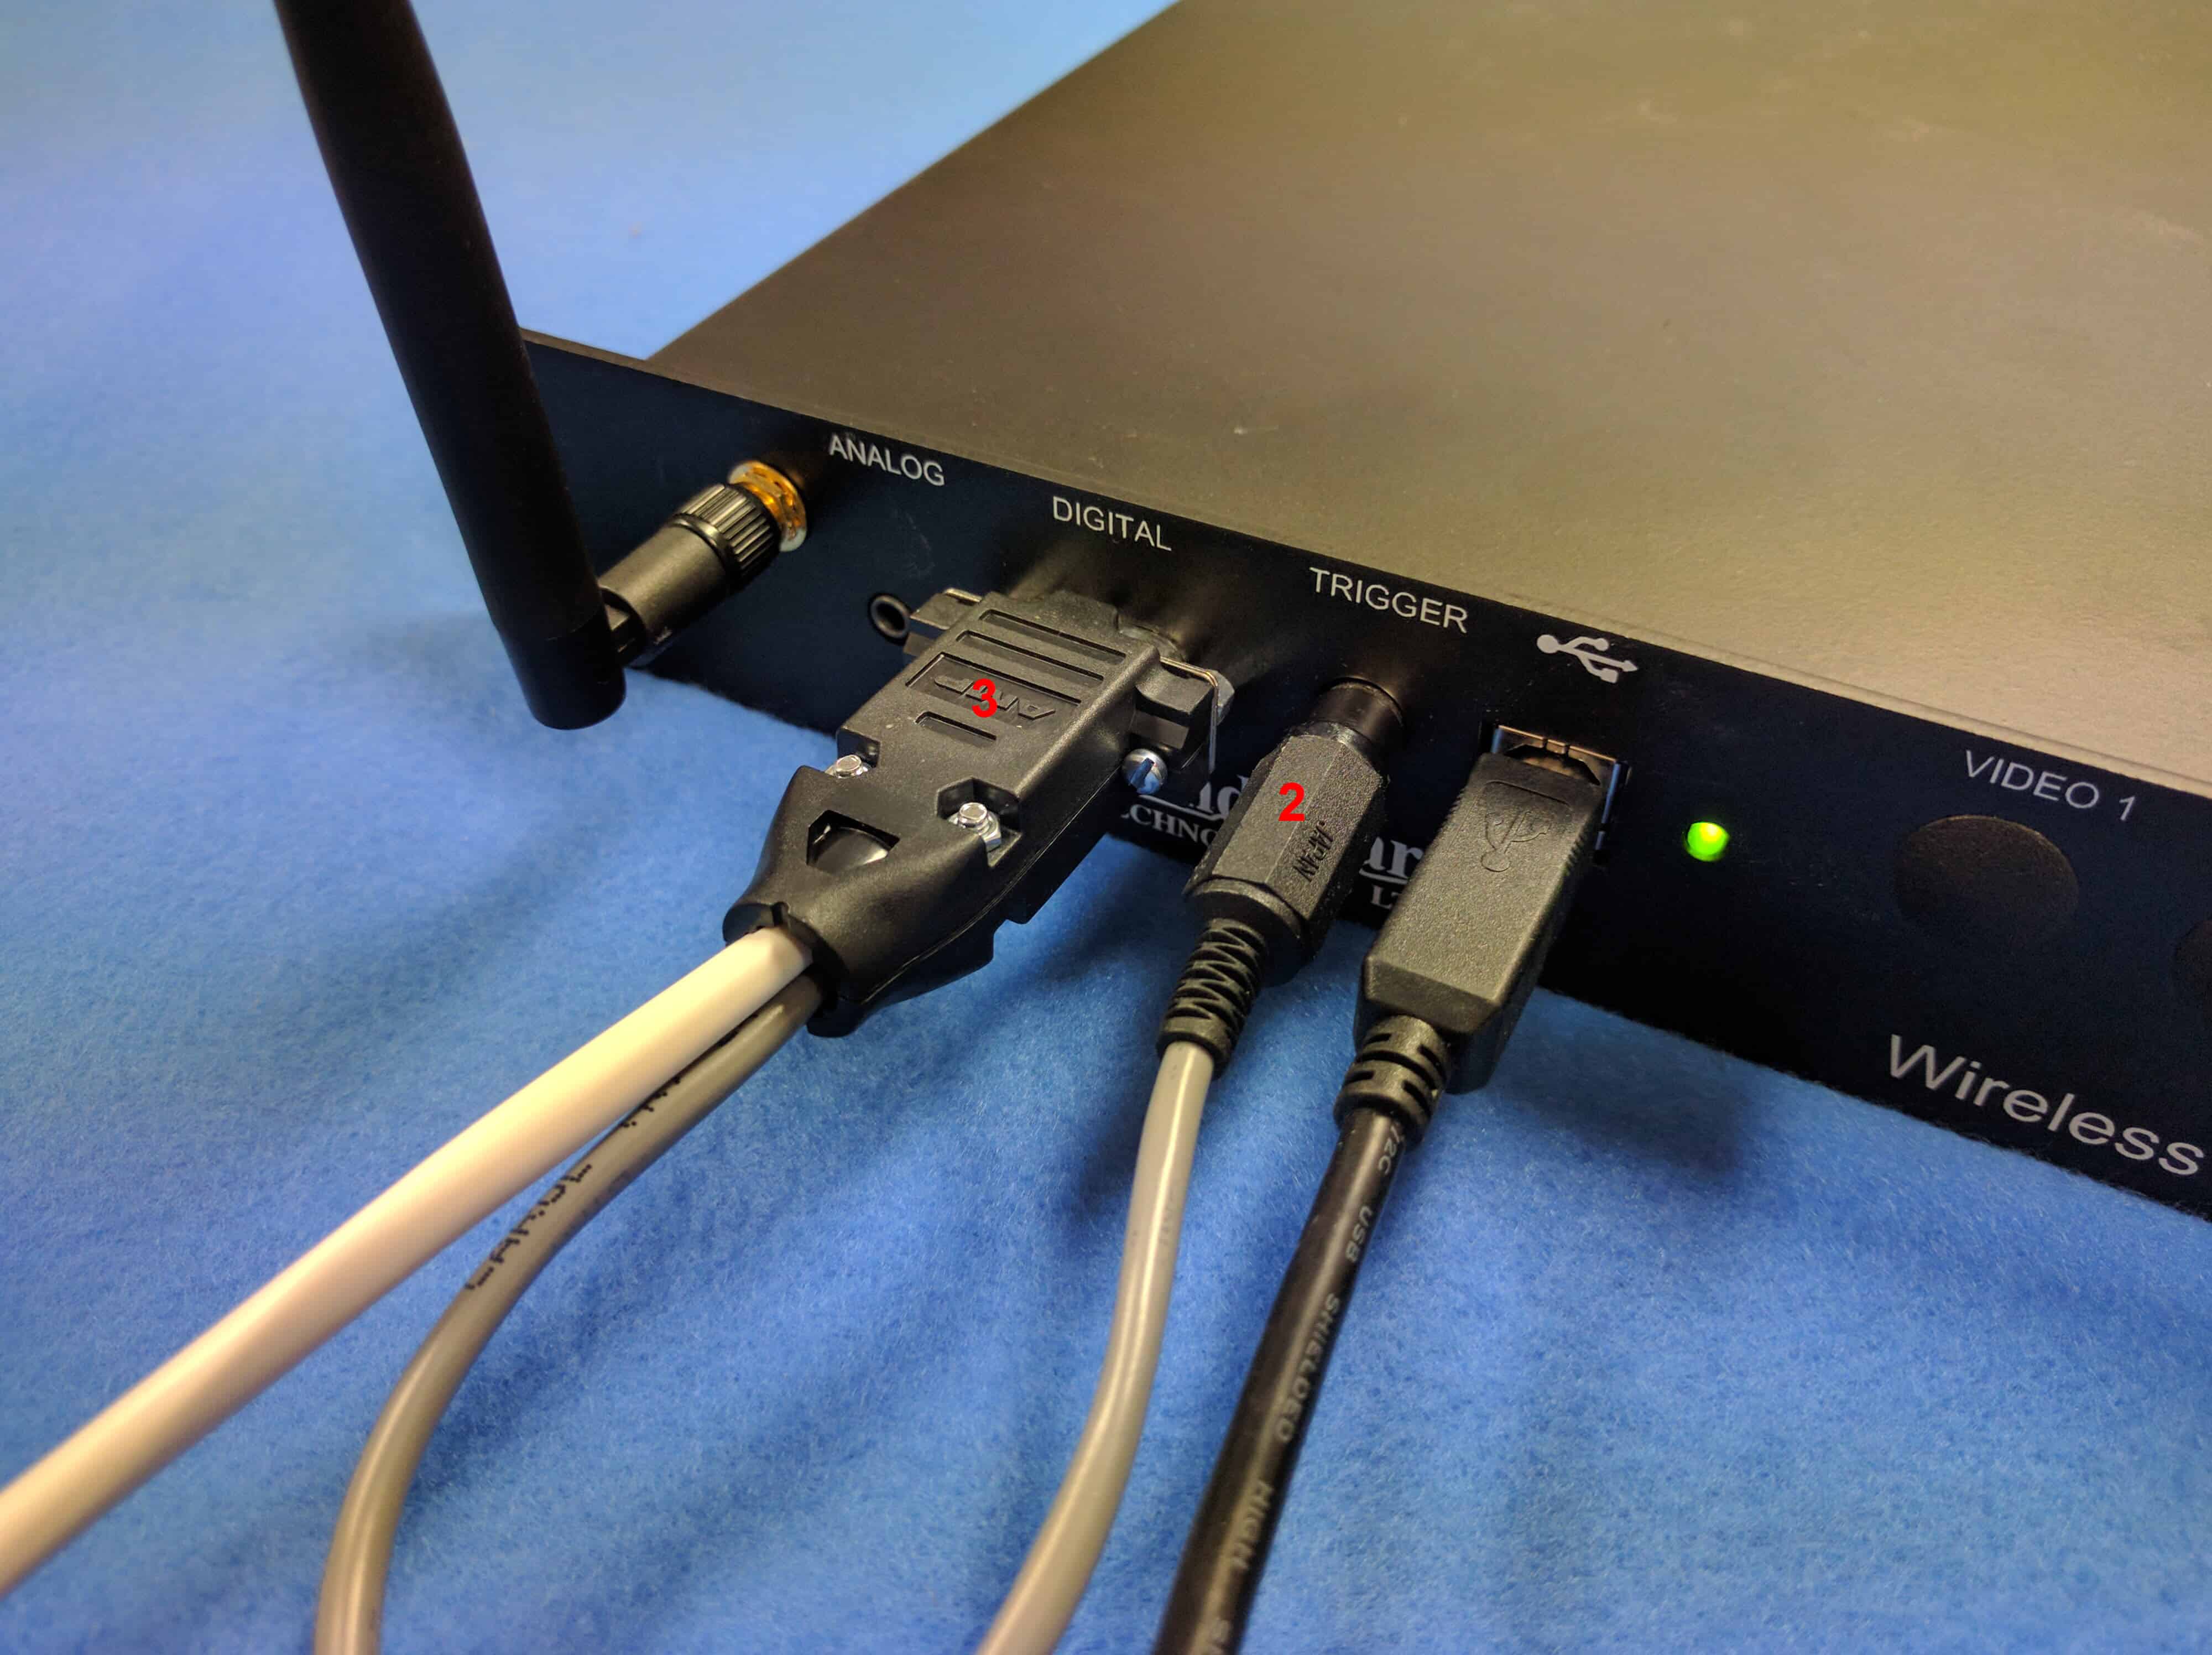
Connection to the Wireless Data Center
Take Connector 3 and plug it into the Digital port on the front of the Wireless Data Center. Be sure to tighten the terminal screws on the connector to secure the connection.
Then take Connector 2 and plug it into the Trigger port right next to it.
Connection to the E-Prime Computer
Plug Connector 1 into the parallel port of the computer running E-Prime. Be sure to tighten the terminal screws on the connector to secure the connection.
Note: On some computers, the parallel port will be in a PCI expansion slot below where it is depicted in the above screenshot. Be sure to plug the connector into the parallel port which has been configured to send digital events in E-Prime.

